7 steps to setting up Stripe payments with Jumpstart Pro
🚀 Here's how to setup Rails/Jumpstart Pro built-in support for monthly and yearly subscriptions with Stripe.

One of the many reasons to launch your next web application on Ruby on Rails is Jumpstart Pro; and one of the many reasons to use Jumpstart Pro is built-in support for monthly and yearly subscriptions with Stripe.
The process for signing up to a yearly Jumpstart Pro license is the very same process that your own subscription customers will see. In addition, you have the option to support monthly payments.
In this article, I'll walk you through the five steps to setting up Stripe and your subscriptions within your Jumpstart Pro application. I'll also point you to the code files that you might want to tweak or style to taste.
This approach is just one way to integrate Stripe into your application. For now, it is the easiest one. Once you've tried it out you might understand better its pros and cons. At the end of the article I've asked Jumpstart Pro's Chris Oliver to summarize his pros and cons.
How do subscriptions work in Jumpstart Pro?
Whilst you can construct any one-time purchases or subscription purchase systems that you want, since your Jumpstart Pro app is all Ruby on Rails code, it might be nice to know what you get out of the box. And what in the box is what I'm going to write about in this article.
After everything is configured – the topic of this article – you will get:
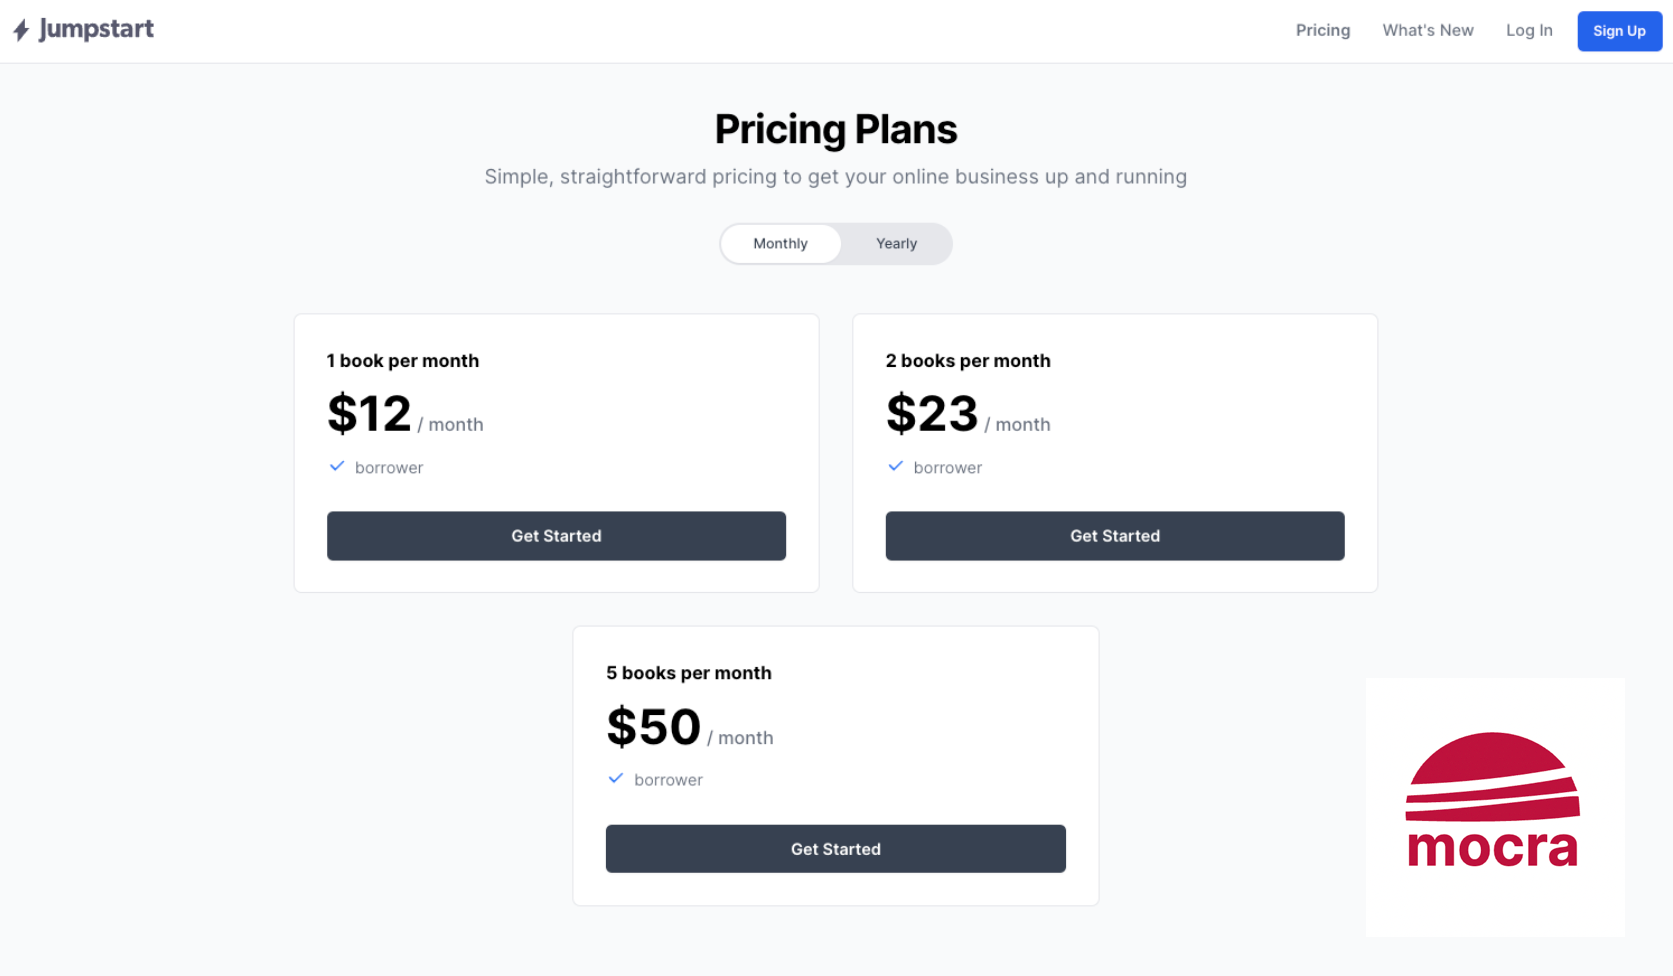
- A Pricing page showing one or more Subscription plans that a user could subscribe to.
- Guests who attempt to select a plan will be asked to Sign up first
- A Checkout page within your Rails app, where credit card details are collected.
- Accounts can have multiple subscriptions.
- A Billing page to show the status of current subscriptions, payment methods, billing history, and the ability to change, pause, or cancel each subscription plan.
A working demo of this user experience is the https://jumpstartrails.com/ website when you signed up for your Jumpstart Pro license.
Our demo app is a Library
Let's create a Library app where an account can borrow 1, 2, or 5 books at a time. The account pays a monthly or yearly subscription. Each lending limit is a different subscription plan. We have 3 tiers and 2 payment intervals.
Inside our application we will be creating 6 Plan objects, and inside Stripe we will be creating 3 products.
And we will duplicate this for development and production.
Setting up Jumpstart Pro
I've written about how I setup a new Jumpstart Pro/Ruby on Rails application. So that's handy. We'll configure Stripe api keys and the local stripe CLI later in Step 3 below.
Step 1 - Stripe account
You'll want a free Stripe account, of course, and then you'll create an account. For this article, I've created a dummy account Demo Library.

Eventually you will need to "Activate payments" on your Stripe account so that you can collect money from customers, and Stripe can forward on most of that money to your bank account. You do not need to do this today.
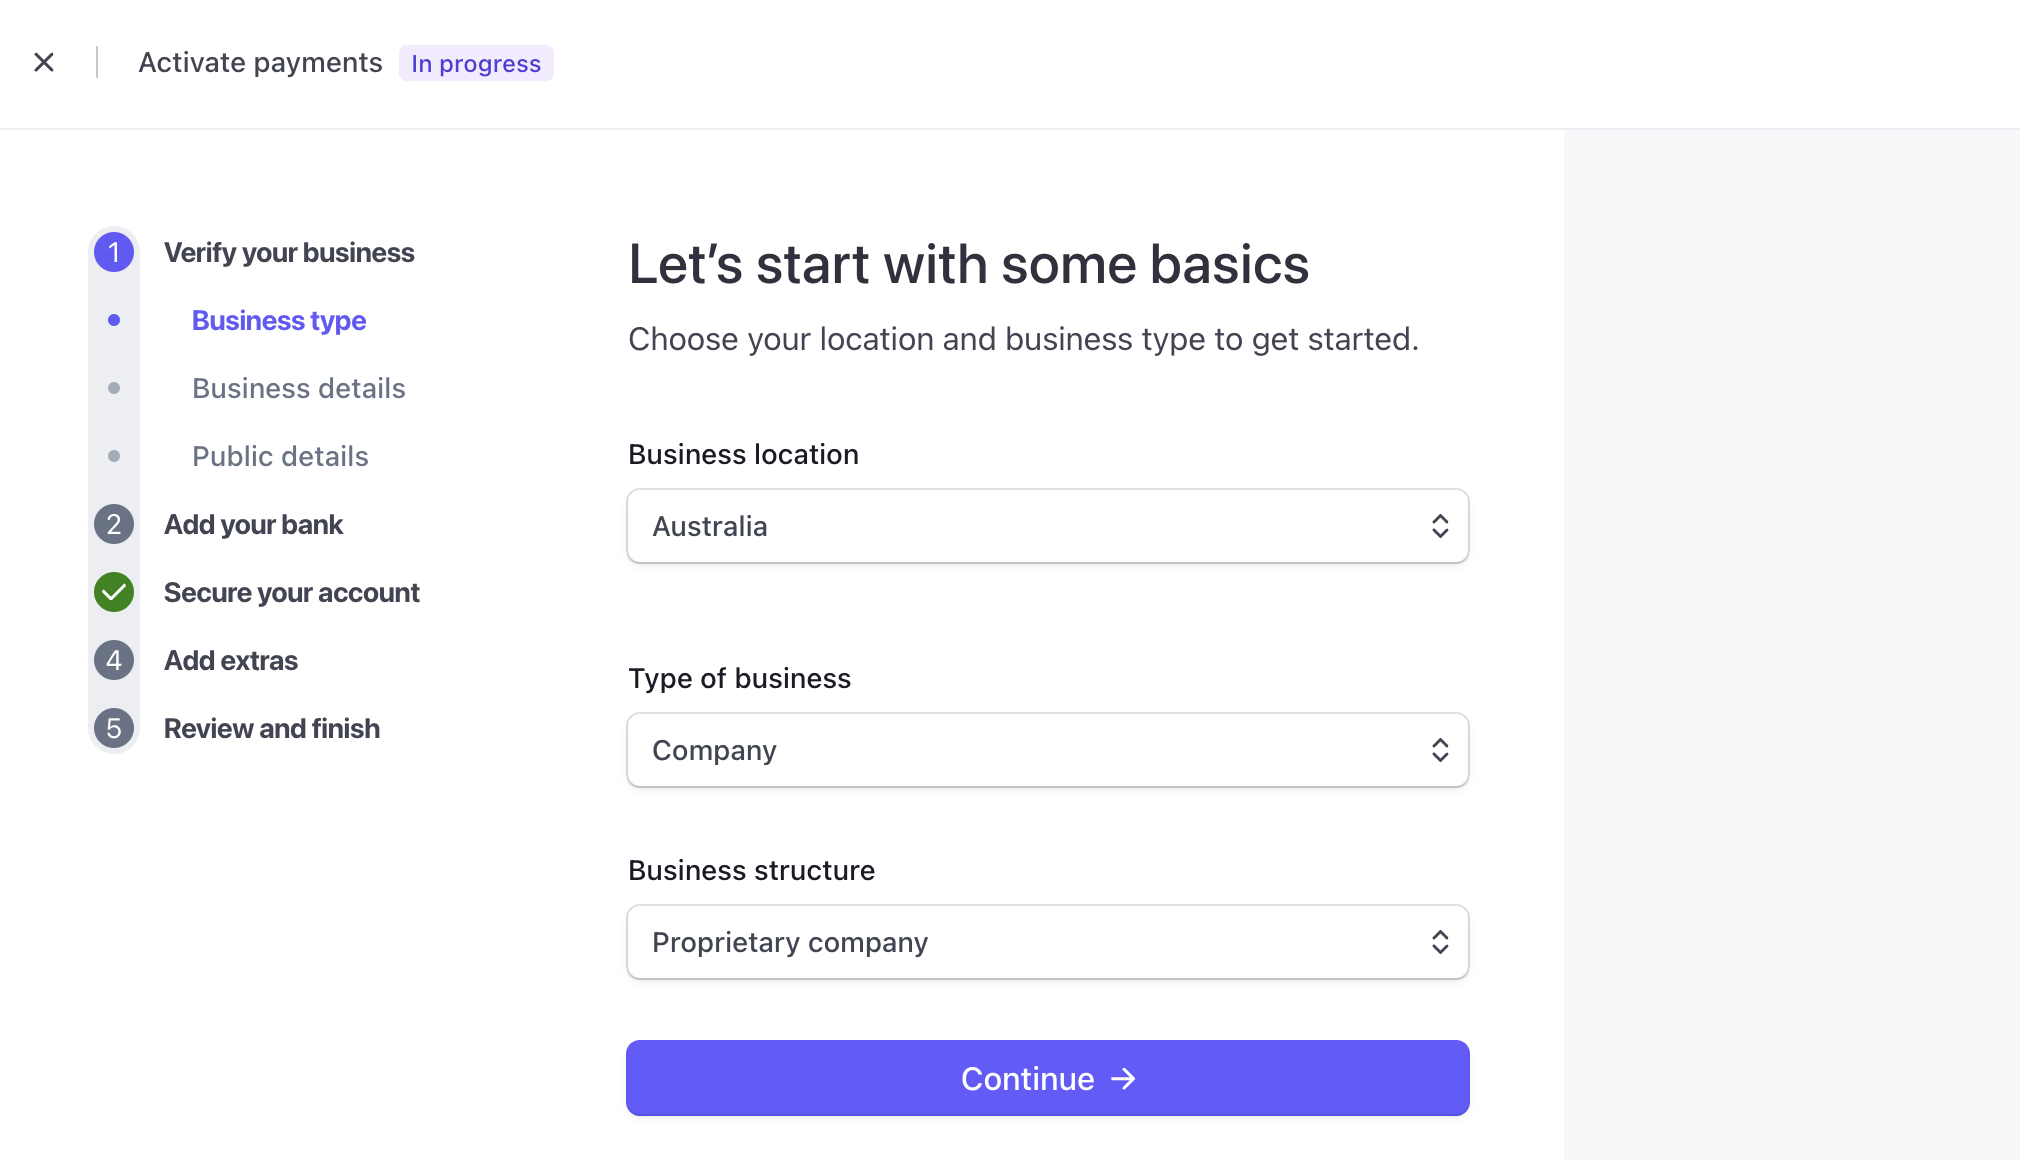
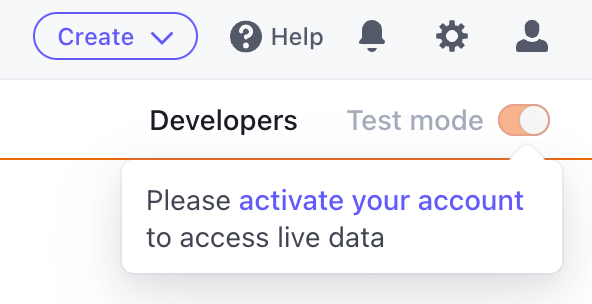
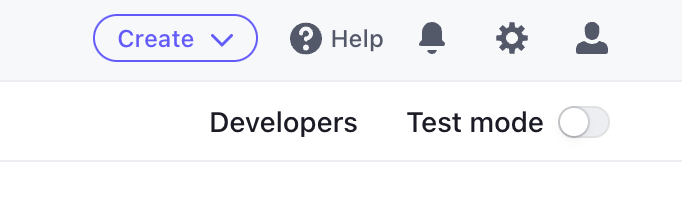
You will be in Stripe's "Test mode" and we will be creating Test Data. You will not be able to toggle to Production mode until you've completed the account activation process.
Step 2 - Create Stripe products
Inside our web app will ultimately be registering one or more subscription plans. Each subscription tier maps to a Stripe product.
Inside the Stripe dashboard there's a lot to see and it is easy to get lost. You haven't yet sold anything (Products) to anyone (Customers), so you do not yet have any Payments, Balances, Billings, or Reports. Click on the Products tab in the top menu bar.
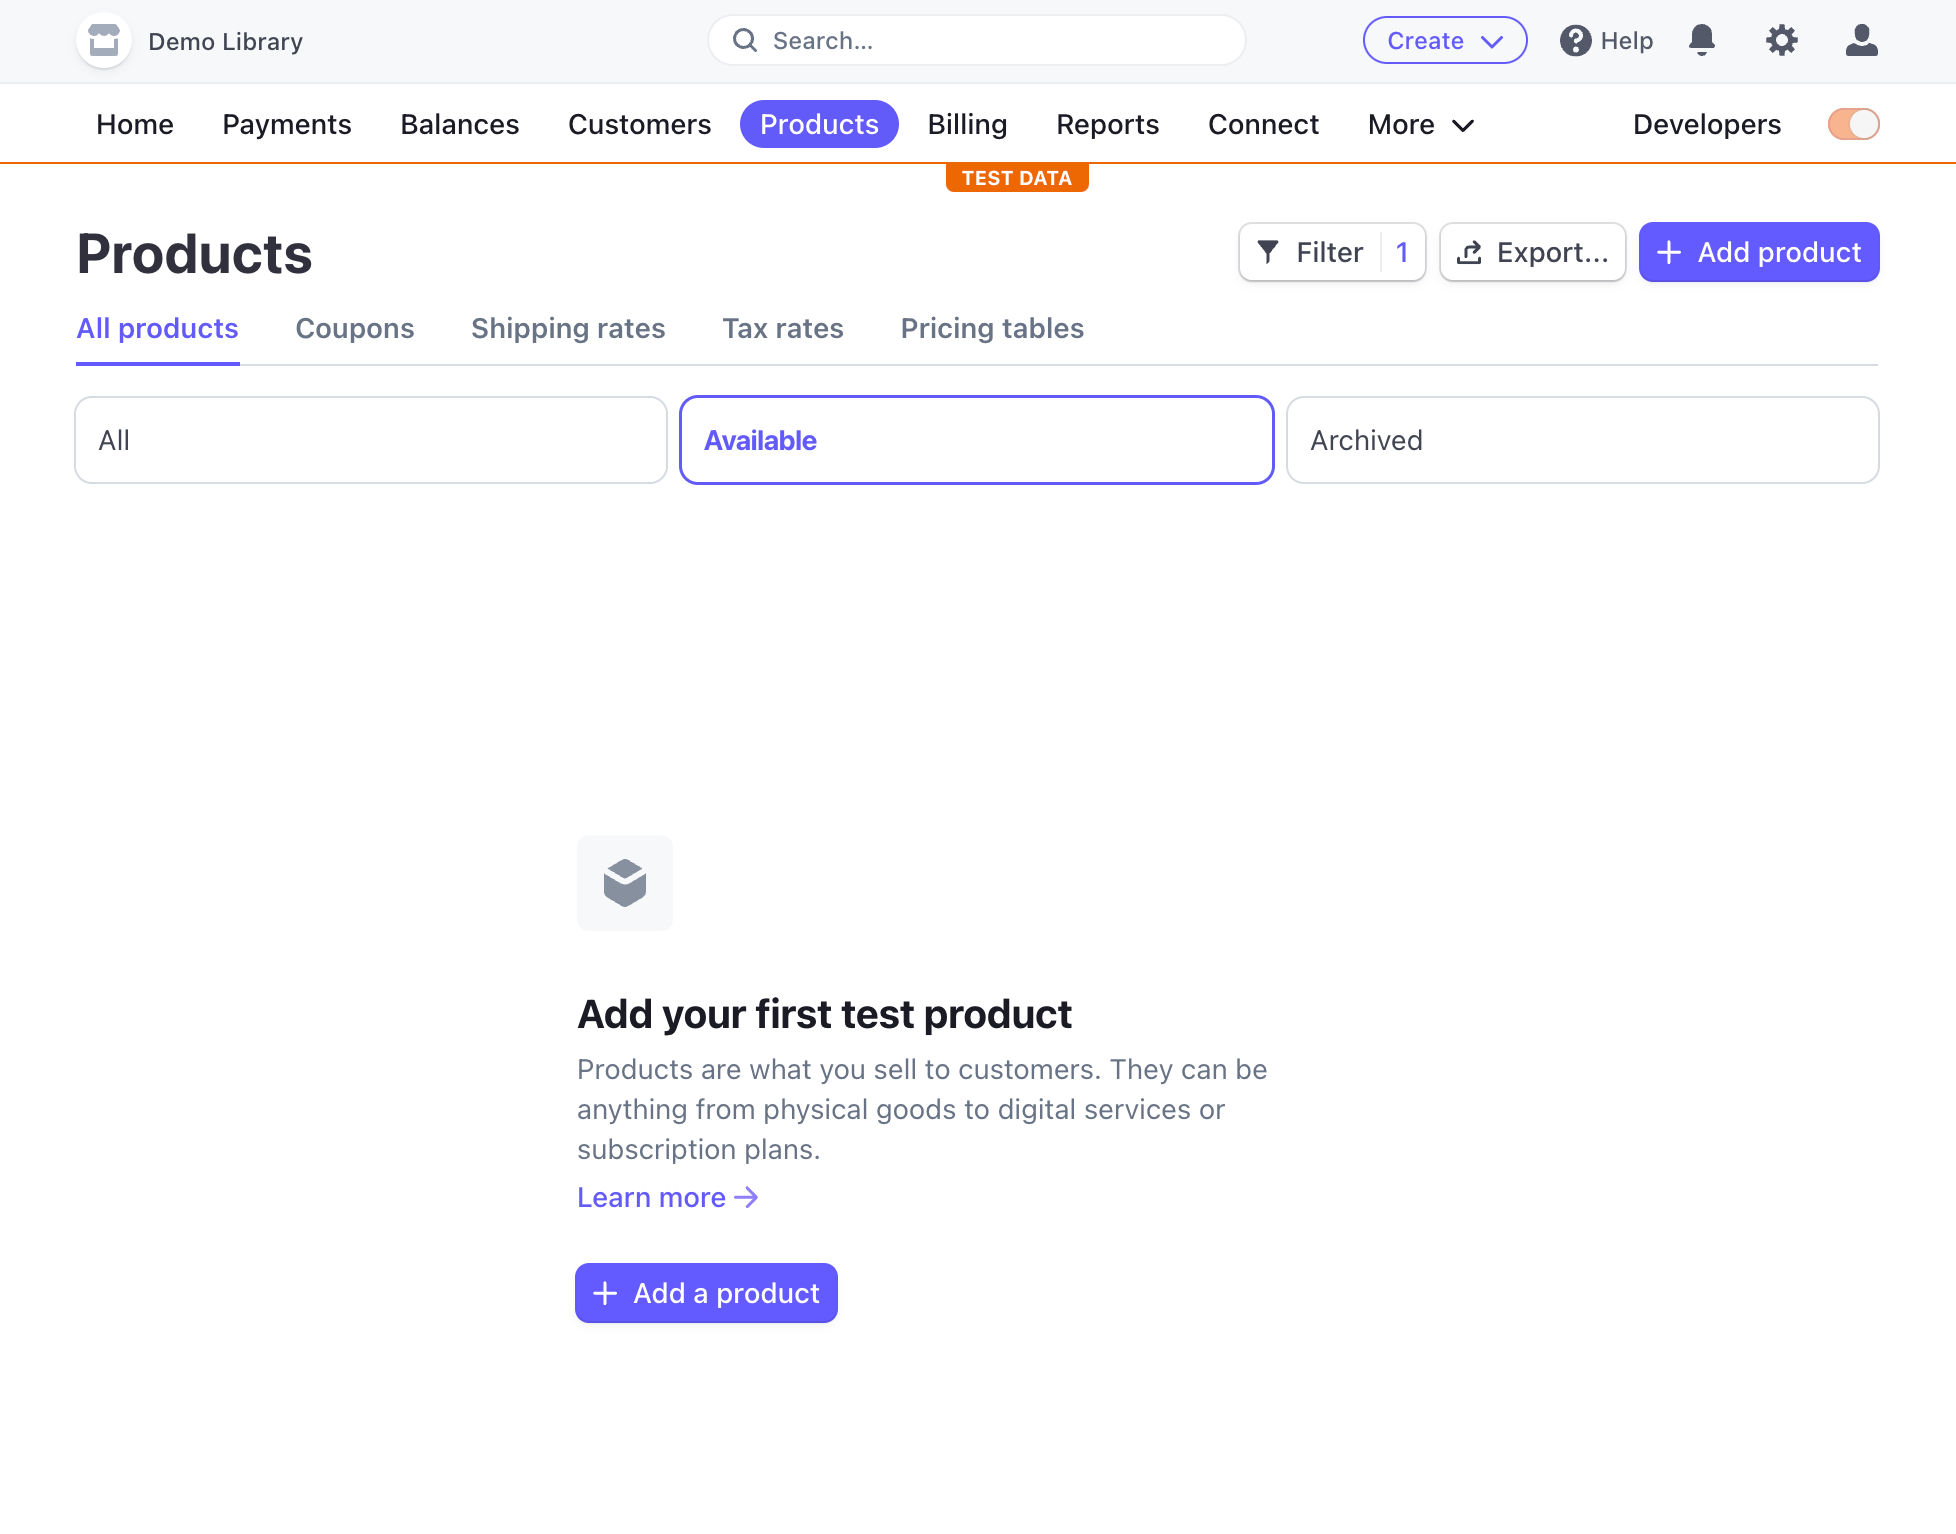
Next, click "Add a product".
For each of our 3 tiers (1, 2, and 5 books at a time) we will create a Stripe Product.
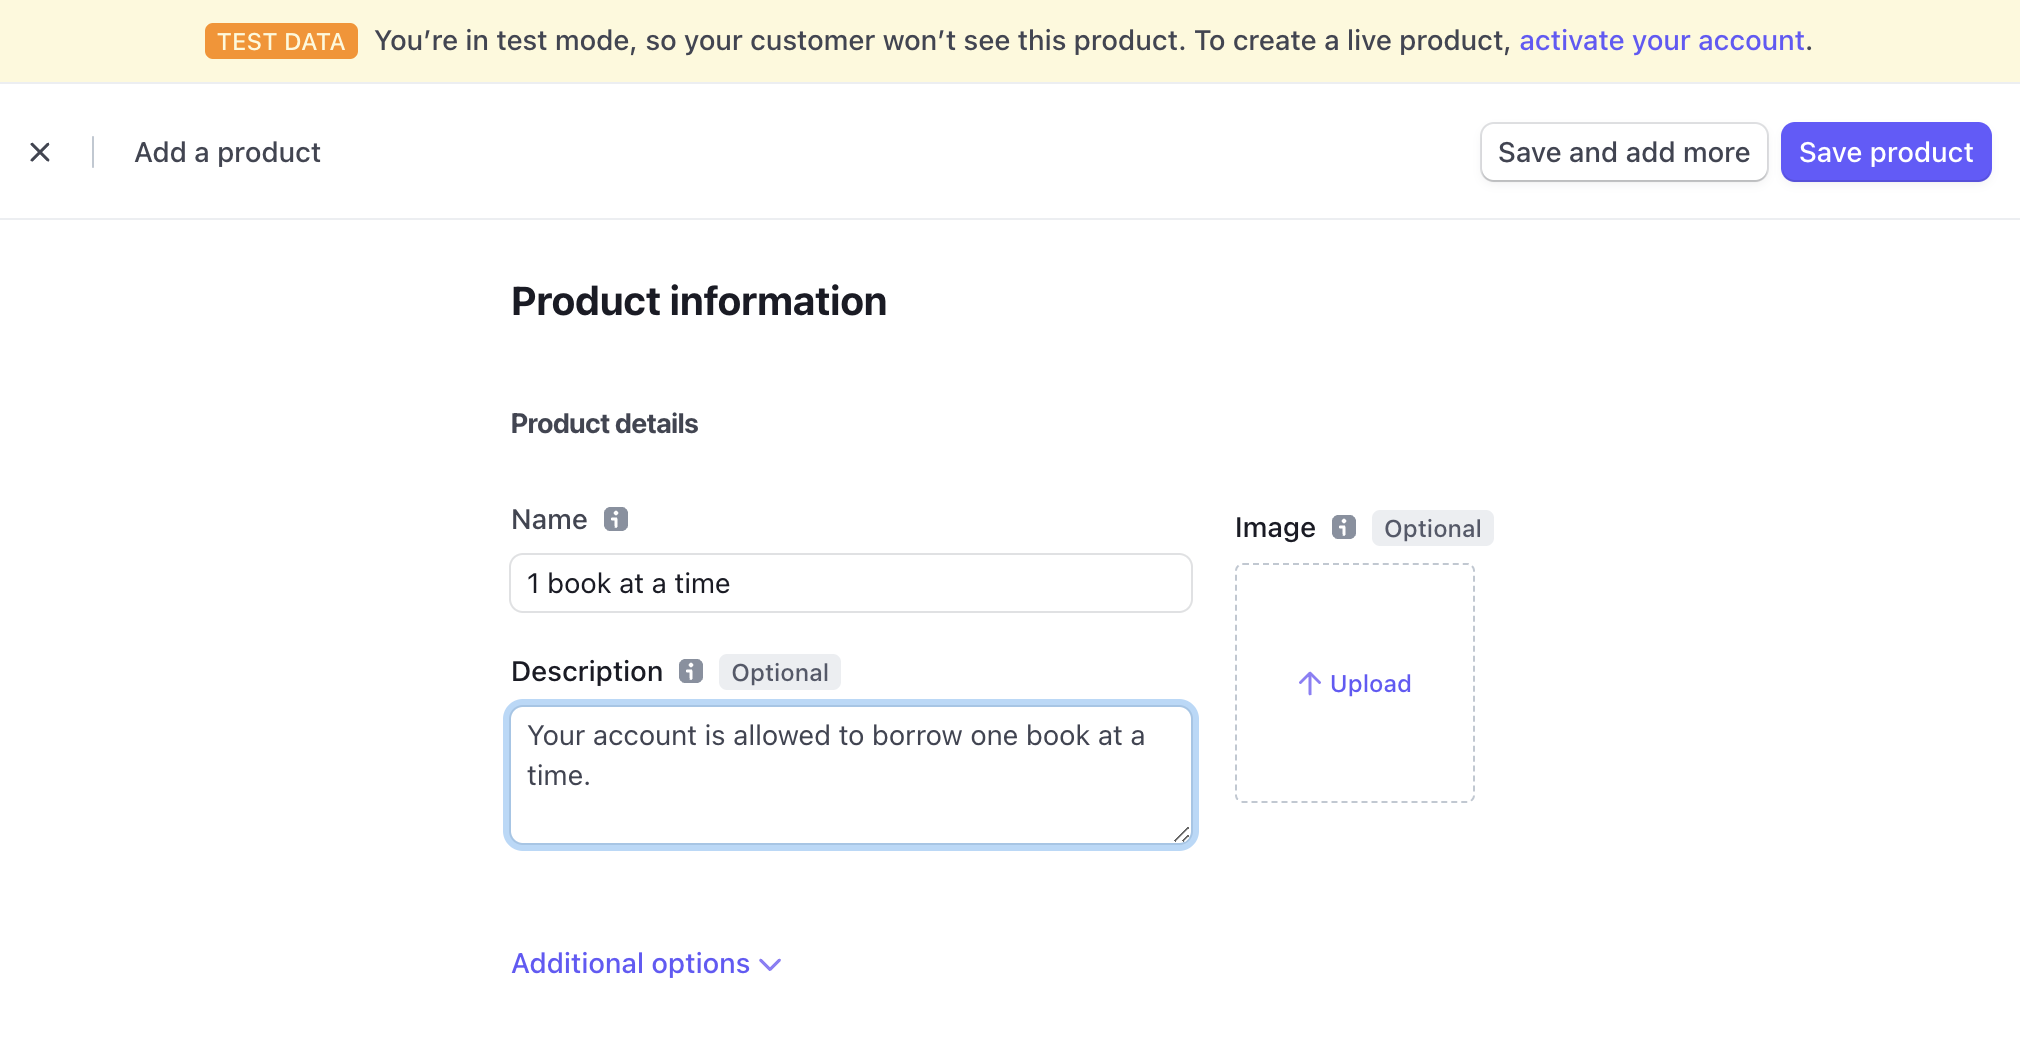
For each product, we want to describe two Billing Periods: Monthly and Yearly.
First, create the Monthly billing period.

Next, click "Add another price", and create a Yearly billing period.
Press "Save product".
We can now see that we have two Pricing options for our first "1 book at a time" product.
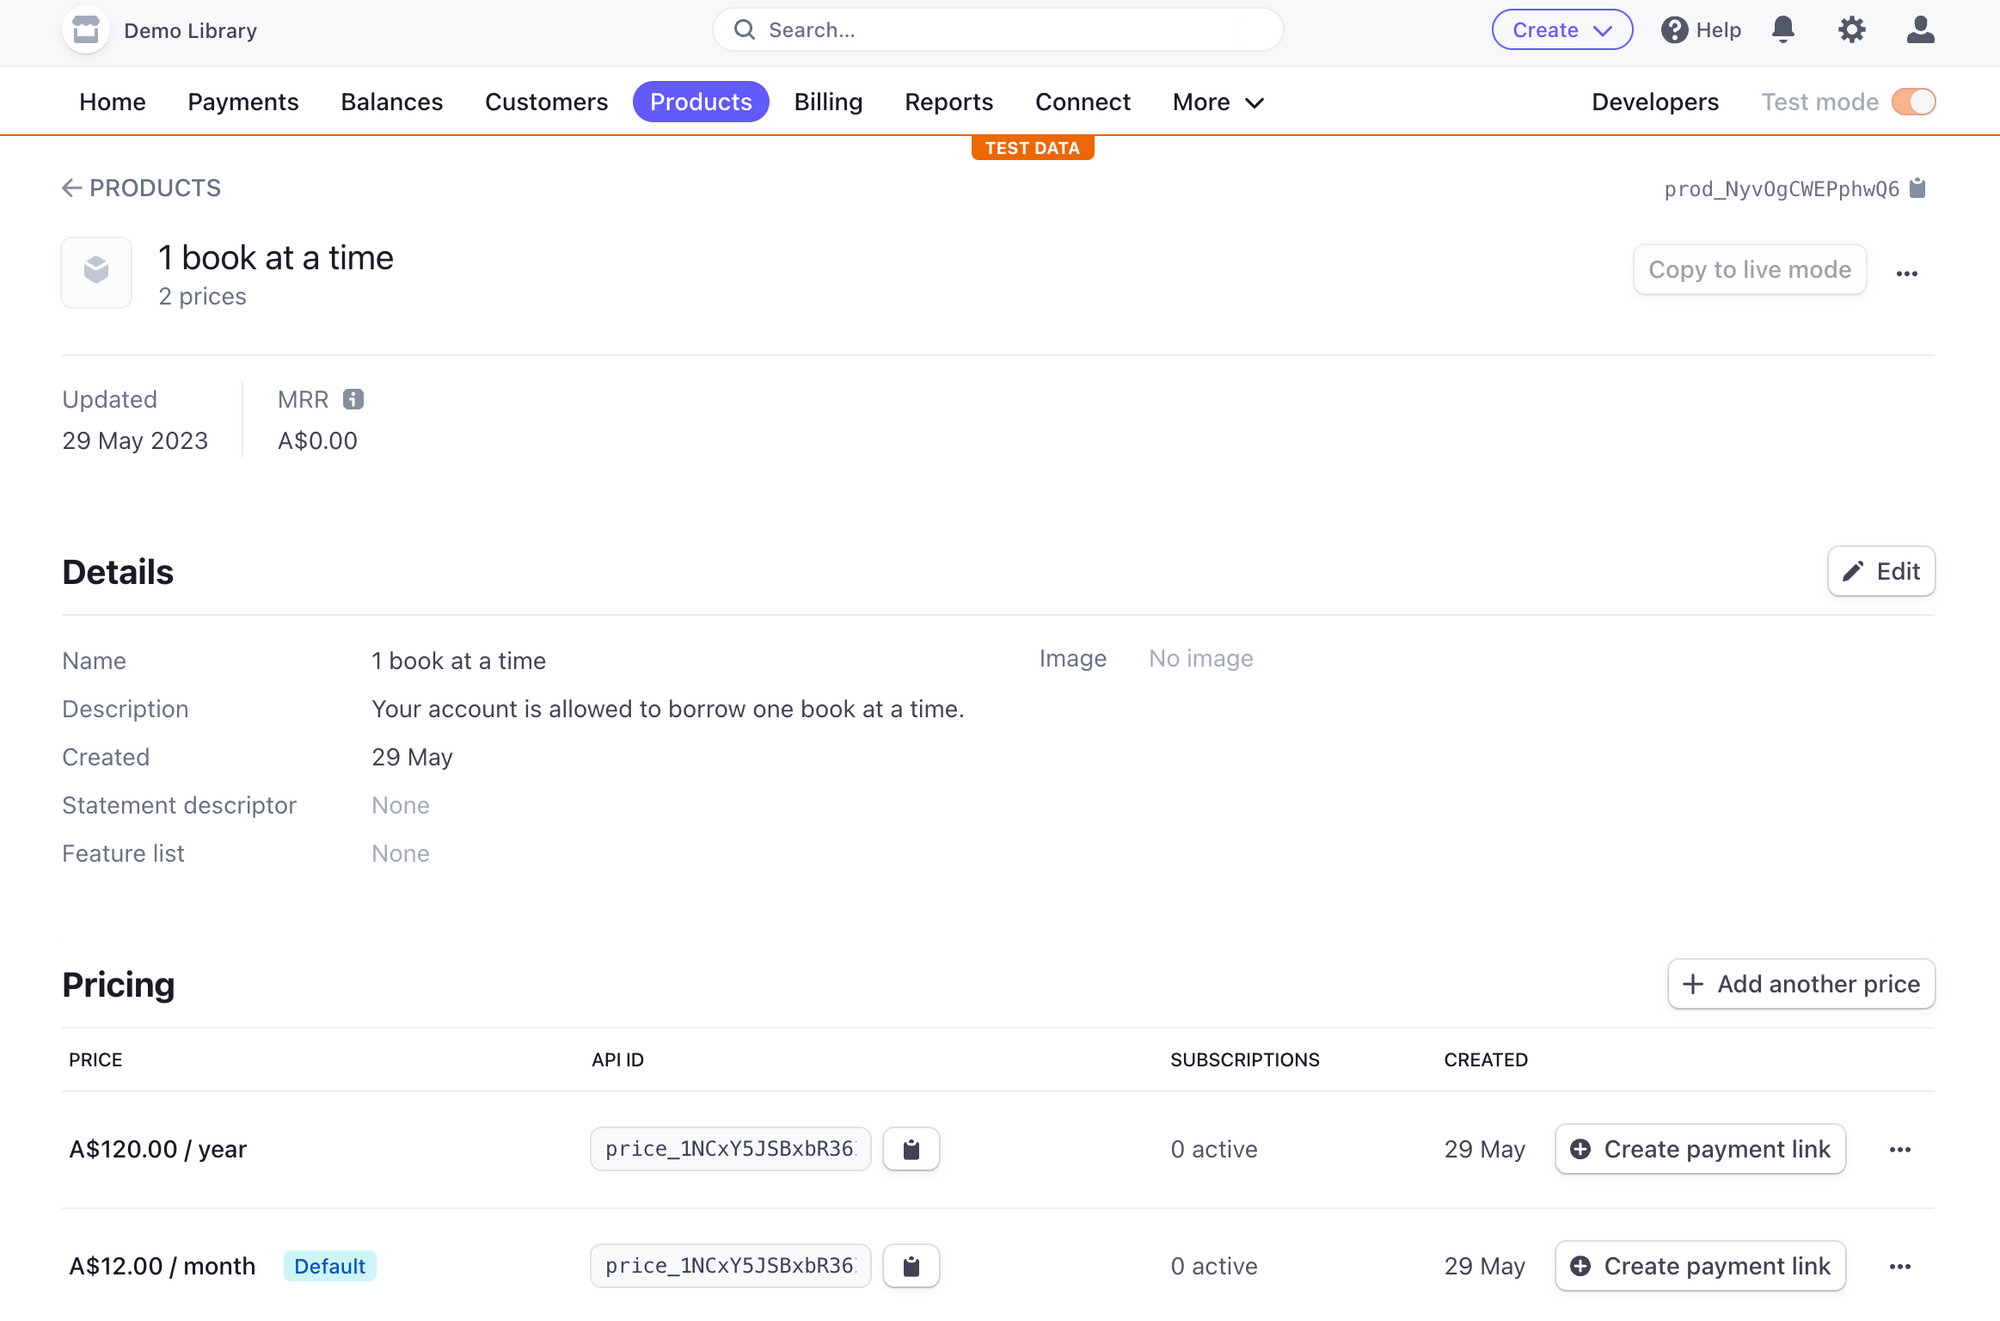
Note that there is a "API ID" value for each pricing option. In Step 4 we will register a Plan for each pricing option and link it to the corresponding API ID above.
Now, we can return to the Products page and create our remaining two Products and their two billing period prices.
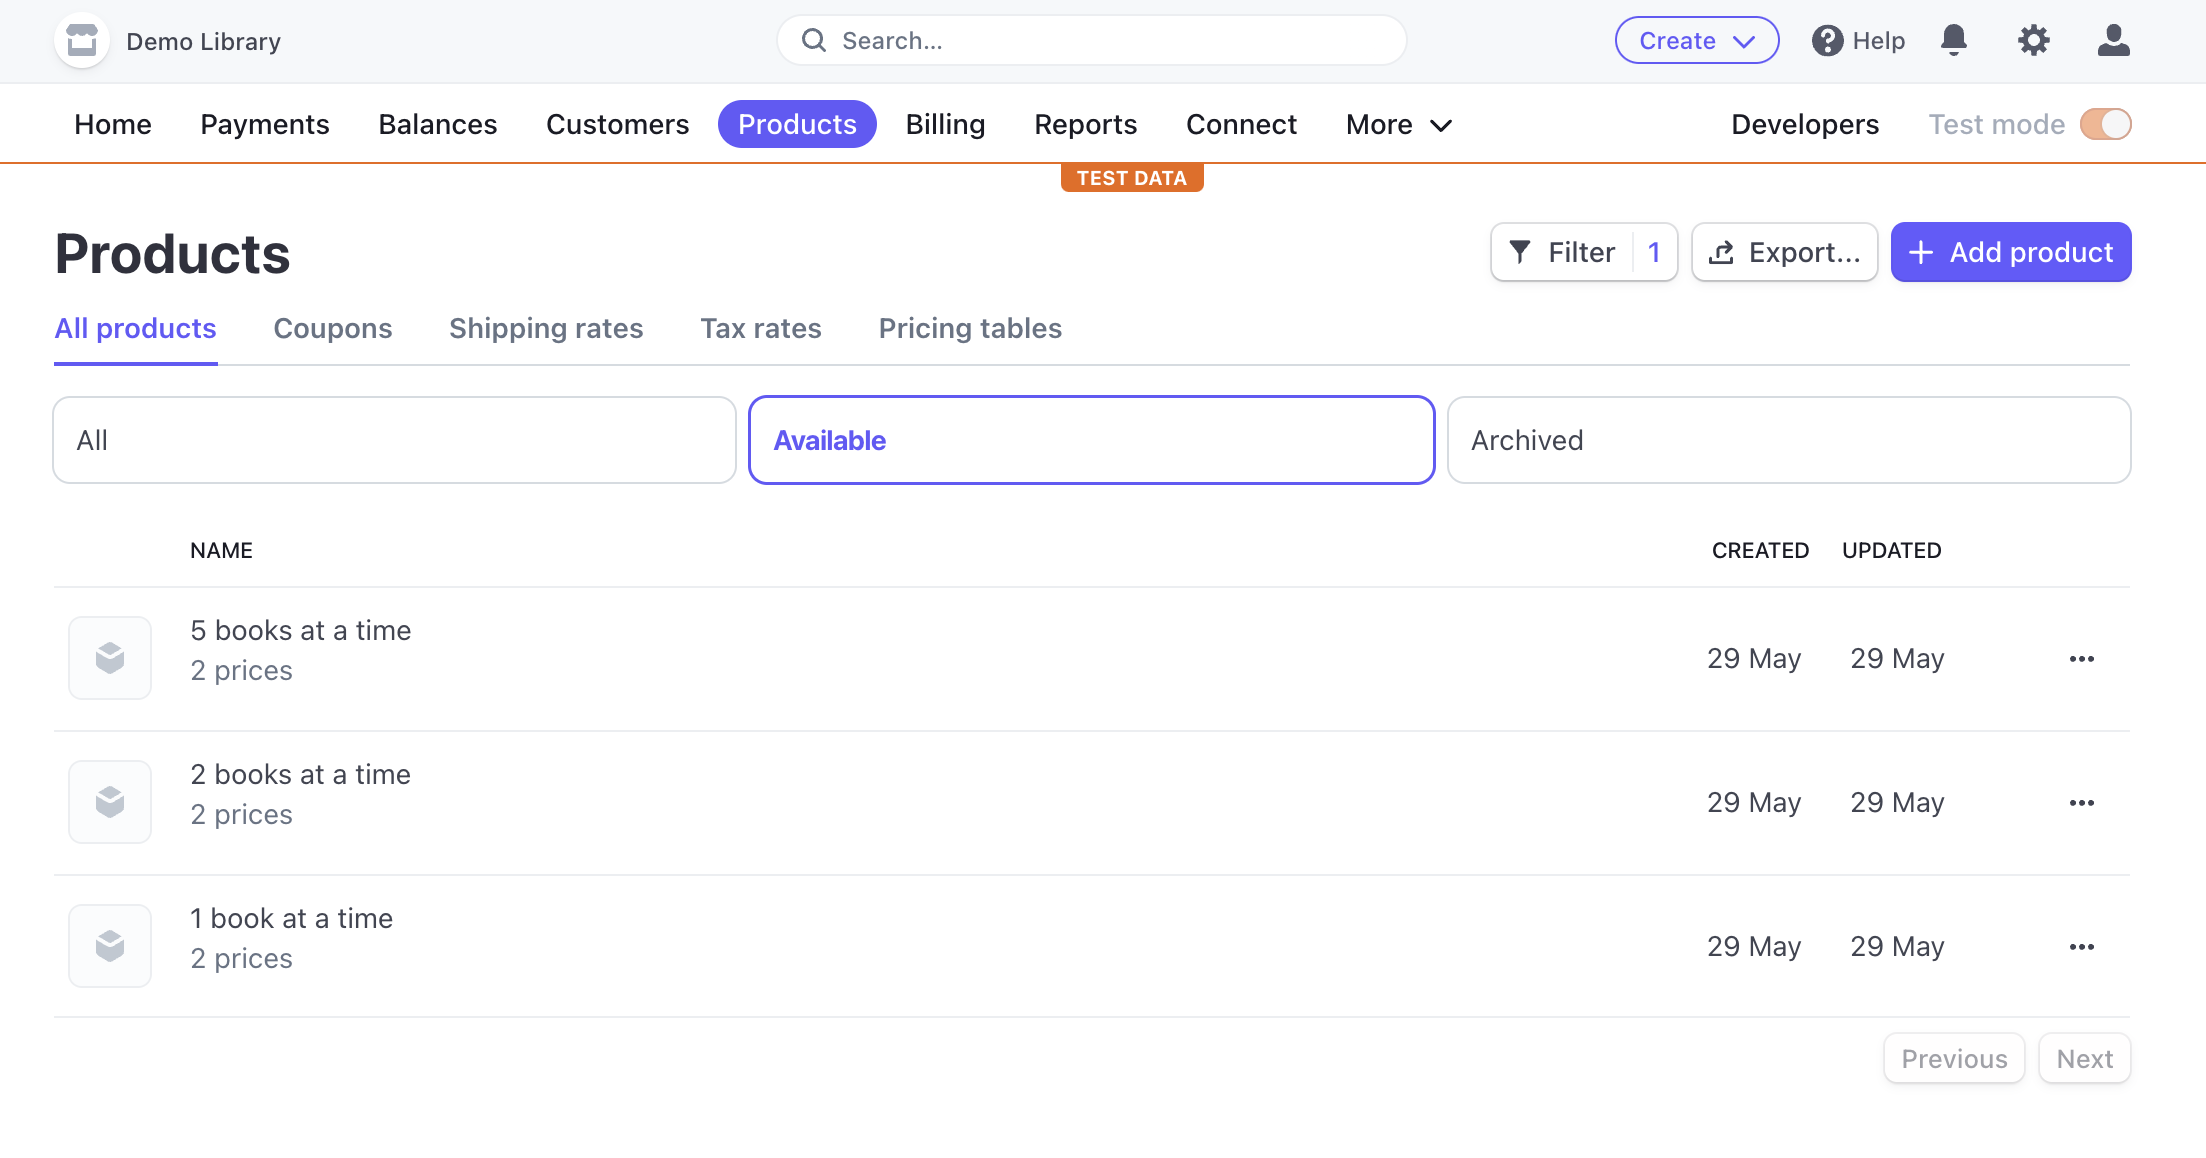
We now have three Stripe Products, each with two billing periods.
Step 3 - Configure Stripe into JSP
We can now configure our Jumpstart Pro app with our Stripe "Test mode" API keys.
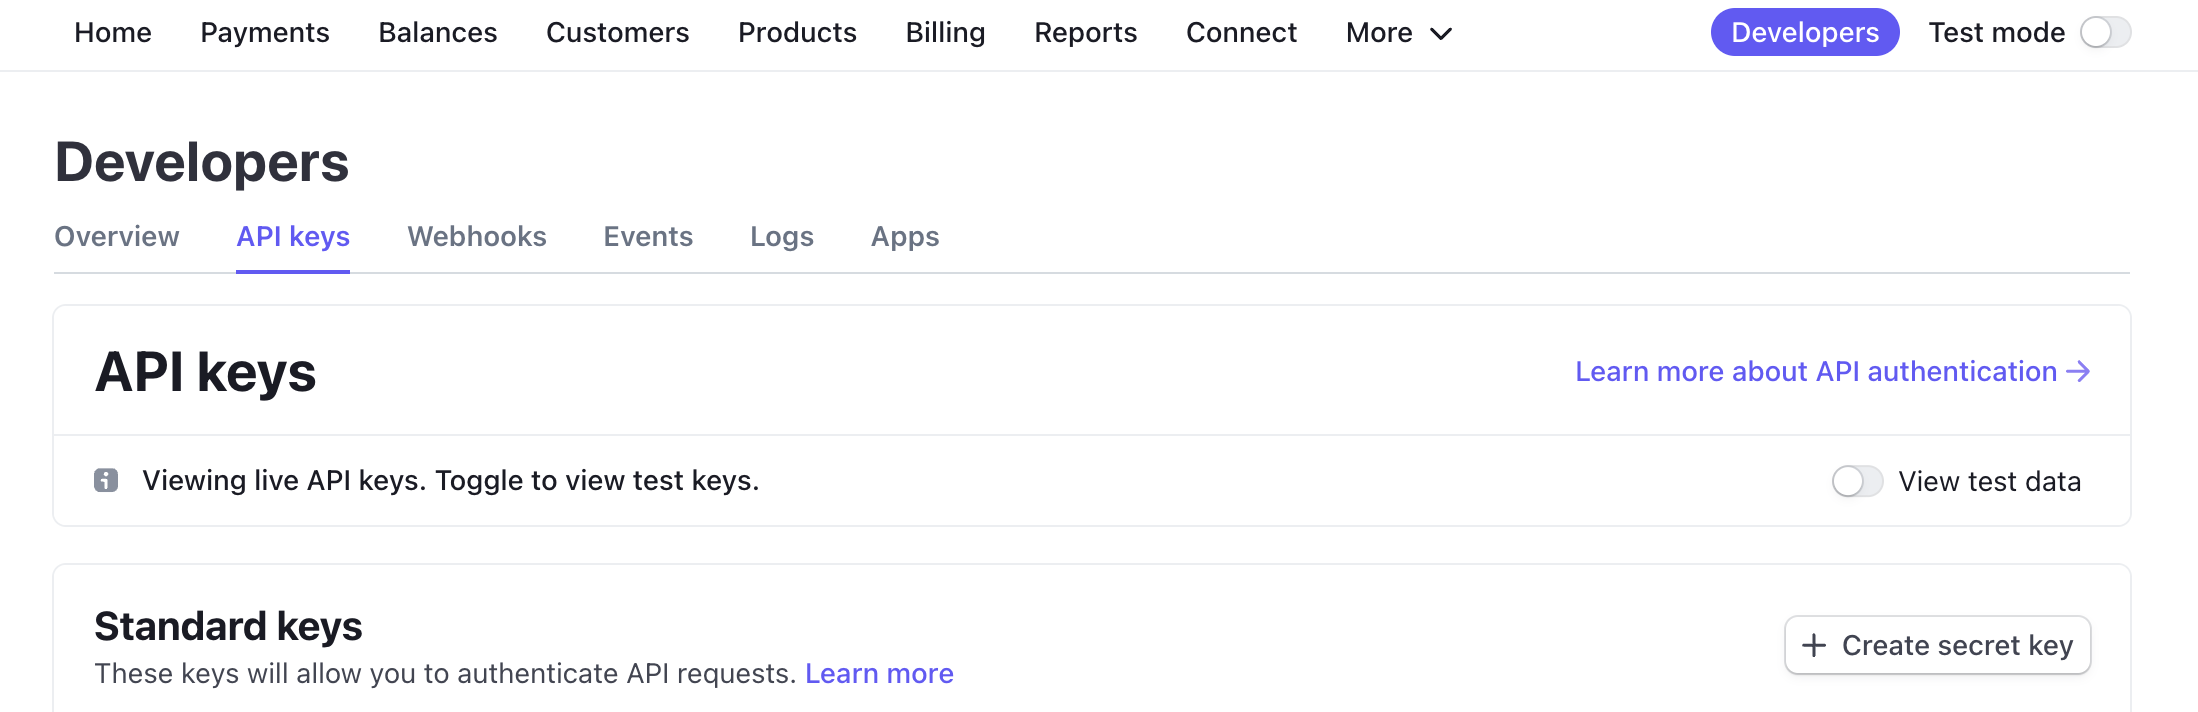
Currently we're on the Products tab. Switch to the Developers tab.

In the Developers sub-menu, change to the "API keys" tab.

Click on "Reveal test key" to see both secret keys.
We now need to copy these into our Jumpstart Pro encrypted configuration for development.
rails credentials:edit --environment developmentNavigate down to the stripe: section and copy/paste in your two secret keys into the config/credentials/development.yml.enc file:
# Stripe Payments
# https://dashboard.stripe.com/account/apikeys
stripe:
  public_key: 'pk_test_51NCx08JSBxbR36IFdOJB93Zye6LoiTHxt3JBYCDzujeVZwJ0eFXOpthpx4xjKjalt1y9x0JZ5MySN7VOfJ2gWQW400UEILAPjC'
  private_key: 'sk_test_51NCx08JSBxbR36IFCXVlXBbf5zUvMNGwvrrbo7uZ6RF3Fq8p1S7YtJqZUL8fWV01IvN1sQTmaLnFIQbrrg2oAlLk002ef6gYZo'

  # For processing Stripe webhooks
  # https://dashboard.stripe.com/account/webhooks
  # Webhooks should be pointed to https://domain.com/webhooks/stripe
  signing_secret: ''
There is a 3rd secret key we need. Let's find that one next.
We can now restart our JSP app, by quitting and re-running bin/dev, and then visiting the JSP Configuration section. Navigate to the Payments sidebar.
You are now able to toggle the "Stripe" checkbox.
Also toggle "Collect billing address during checkout" if required.
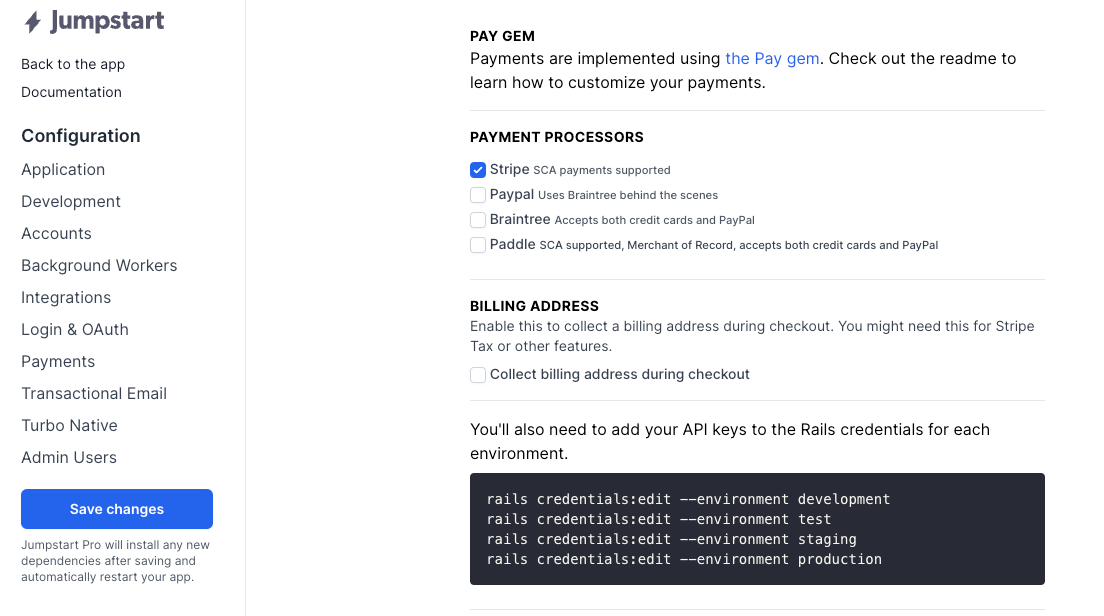
Press "Save changes".
Cancel/stop your bin/dev process once again. Hold off from running bin/dev again for a moment.
Look inside Procfile.dev and you'll see a new stripe process has been added:
stripe: stripe listen --forward-to localhost:3000/webhooks/stripeManually run this stripe listen command. We need to first login and then fetch a generated secret string.
$ stripe listen --forward-to localhost:3000/webhooks/stripe
You have not configured API keys yet. Running `stripe login`...
Your pairing code is: vivid-assure-luxury-breeze
This pairing code verifies your authentication with Stripe.
Press Enter to open the browser or visit https://dashboard.stripe.com/stripecli/confirm_auth?t=OuFwRcJezbtHsMnW7TzYwLhTEftpOzCr (^C to quit)
Visit the URL, and authorize the stripe listen command to access your Stripe account.

Now run the stripe listen command manually again. We will now be rewarded with a development/test webhook secret:
stripe listen --forward-to localhost:3000/webhooks/stripe
> Ready! You are using Stripe API Version [2022-11-15]. Your webhook signing secret is whsec_244f403a398ae788a5903d74fdd6d5bf15d97b8230ec4db82544cdc7951a812b (^C to quit)
Exit the stripe listen command, and return to the encrypted development configuration:
rails credentials:edit --environment developmentIn the stripe: section, add the webhook signing secret:
# Stripe Payments
# https://dashboard.stripe.com/account/apikeys
stripe:
  public_key: 'pk_test_51NCx08JSBxbR36IFdOJB93Zye6LoiTHxt3JBYCDzujeVZwJ0eFXOpthpx4xjKjalt1y9x0JZ5MySN7VOfJ2gWQW400UEILAPjC'
  private_key: 'sk_test_51NCx08JSBxbR36IFCXVlXBbf5zUvMNGwvrrbo7uZ6RF3Fq8p1S7YtJqZUL8fWV01IvN1sQTmaLnFIQbrrg2oAlLk002ef6gYZo'

  # For processing Stripe webhooks
  # https://dashboard.stripe.com/account/webhooks
  # Webhooks should be pointed to https://domain.com/webhooks/stripe
  signing_secret: 'whsec_244f403a398ae788a5903d74fdd6d5bf15d97b8230ec4db82544cdc7951a812b'
You can now git add and git commit the changes to config/credentials/development.yml.enc, .gitignore, Gemfile.lock, etc.
Re-launch bin/dev and you'll notice that stripe listen is now always being run in parallel with our Rails application, and the css/js building commands.
Step 4 - Register Subscription Plans
The Plan#amount value is in cents, not dollars. So a price of $12.00 would be entered as 1200. It doesn't matter that I've told you this. You'll still get it wrong. We all do.
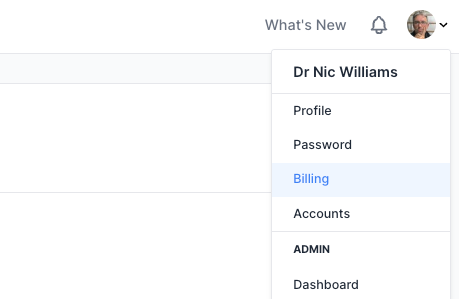
You have a couple ways to create Plan objects. You could go into the Admin dashboard, via the Profile nav menu, and add them there:
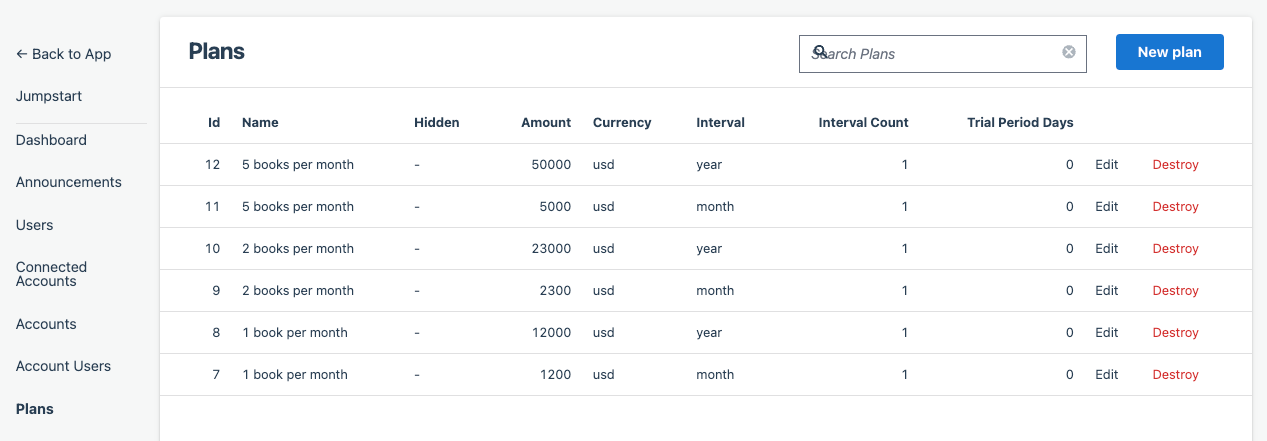
Or add them in the Rails console.
I decided to create mine in my db/seeds.rb file so that they are recreated if I need to flush my local dev database; and they will be recreated for any other developers on the project.
# Create 3 tiers, each with monthly and annual versions,
# based on "1 book per month", "2 books per month", and "5 books per month"
# The annual amount is 10x the monthly amount.
if Rails.env.development?
  plans = [
    {name: "1 book per month", amount: 1200, interval: "month", stripe_id: "price_1NCxY5JSBxbR36IFEIcOrrws", features: {books_per_month: 1}},
    {name: "1 book per month", amount: 12000, interval: "year", stripe_id: "price_1NCxY5JSBxbR36IFa7GalbQ5", features: {books_per_month: 1}},
    {name: "2 books per month", amount: 2300, interval: "month", stripe_id: "price_1NCxdiJSBxbR36IFuZfRSSbd", features: {books_per_month: 2}},
    {name: "2 books per month", amount: 23000, interval: "year", stripe_id: "price_1NCxdiJSBxbR36IFkIcdVfJH", features: {books_per_month: 2}},
    {name: "5 books per month", amount: 5000, interval: "month", stripe_id: "price_1NCxeNJSBxbR36IFNVvi6Xbf", features: {books_per_month: 5}},
    {name: "5 books per month", amount: 50000, interval: "year", stripe_id: "price_1NCxeNJSBxbR36IFdar2iobu", features: {books_per_month: 5}}
  ]
  # Now the Plans
  plans.each do |data|
    plan = Plan.find_or_create_by(name: data[:name], interval: data[:interval])
    plan.update!(data)
  end
end
To have a look at each Plan more closely, here are the attributes for one of the plans:
{
  name: "5 books per month",
  amount: 50000,
  interval: "year",
  stripe_id: "price_1NCxeNJSBxbR36IFdar2iobu",
  features: {books_per_month: 5}
}
The Plan#name matches the name used inside Stripe. This isn't required, but it is convenient for support to see the same human label in both places.
As above, the Plan#amount is in cents, so 5000 matches to $50.00.
The Plan#stripe_id value matches the API ID for each Stripe Product billing plan price from Step 2 above.
Finally, our application specific data is in Plan#features. This is how the rest of the application knows what features or constraints that the Current.account is paying for.
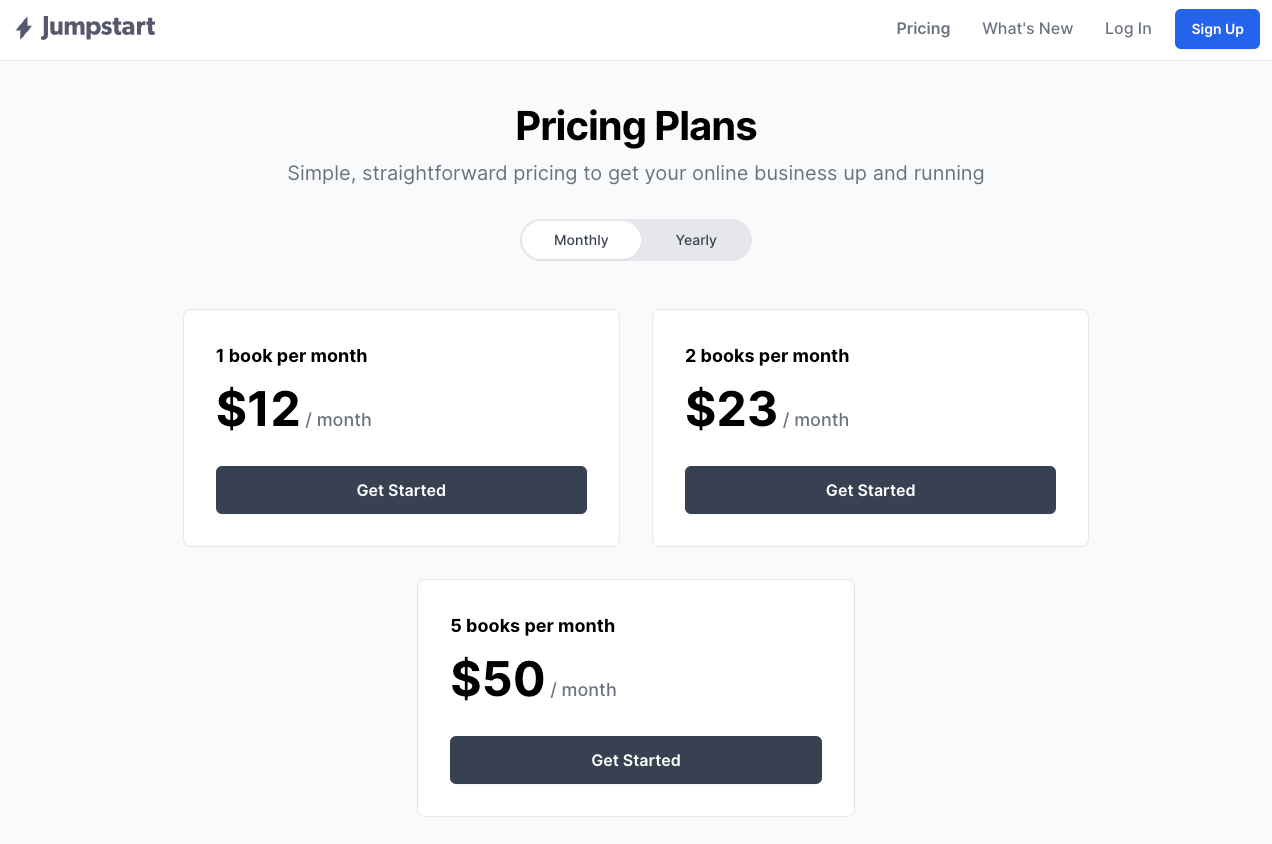
Register the seed products:
rails db:seedsAnd visit the Pricing page for our app. Ooh yeah. Toggle between Monthly and Yearly and be amazed. Thanks Jumpstart Pro.
Step 5 - Testing purchases, upgrades, and cancellations
Let's test the magic!
Currently you're looking at your development app, which is populated with subscription plans mapped to Stripe test data. It is safe to buy, upgrade, and cancel to your hearts content.
If we click "Get Started" on one of the six plan options, we navigate to a page where we can fill out our payment details.
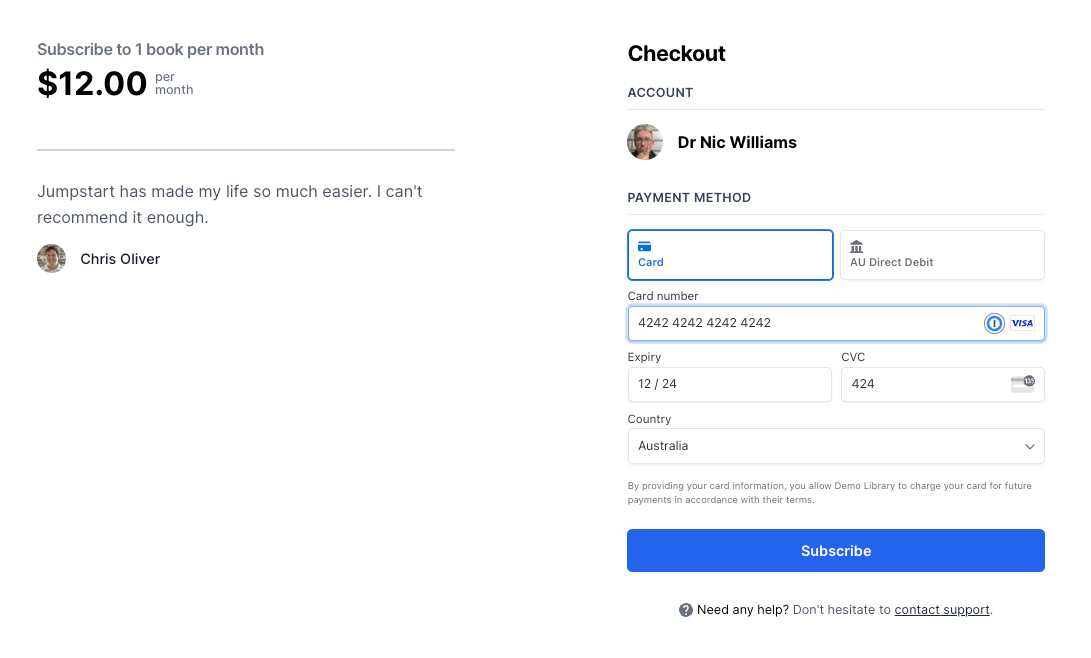
Stripe provide developers with a set of fake card numbers to use for development and testing. Working cards and invalid cards.
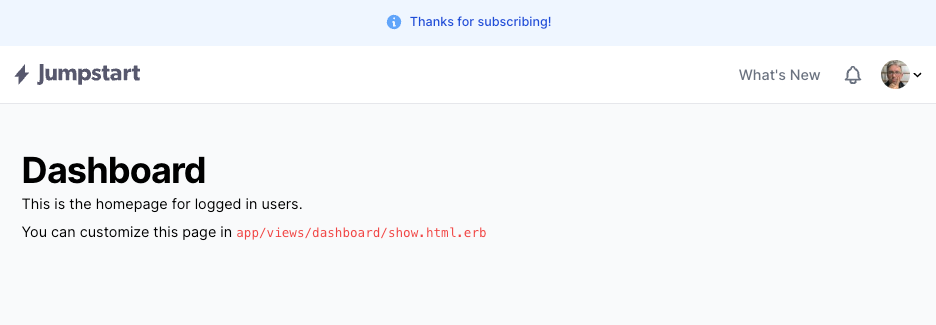
After pressing "Subscribe" we are greeted with a blue notice of delight: "Thanks for subscribing!"
What does this mean within our JSP app? How does our application know if an Account is subscribed to a plan, and what features/constraints are they paying for?
Open up a rails console and let's explore this Account (assume it is Account.first).
We can learn that this Account is a customer on Stripe.
> current_account = Account.first

> current_account.payment_processor
#<Pay::Customer:0x000000010c772bc8
 id: 1,
 owner_type: "Account",
 owner_id: 1,
 processor: "stripe",
 processor_id: "cus_NywYkg4NK1RblR",
 default: true,
 data: {},
 deleted_at: nil,
 created_at: Mon, 29 May 2023 05:31:18.219921000 UTC +00:00,
 updated_at: Mon, 29 May 2023 05:35:36.068447000 UTC +00:00,
 payment_method_token: nil>
We can confirm this by visiting the Stripe Customers tab:
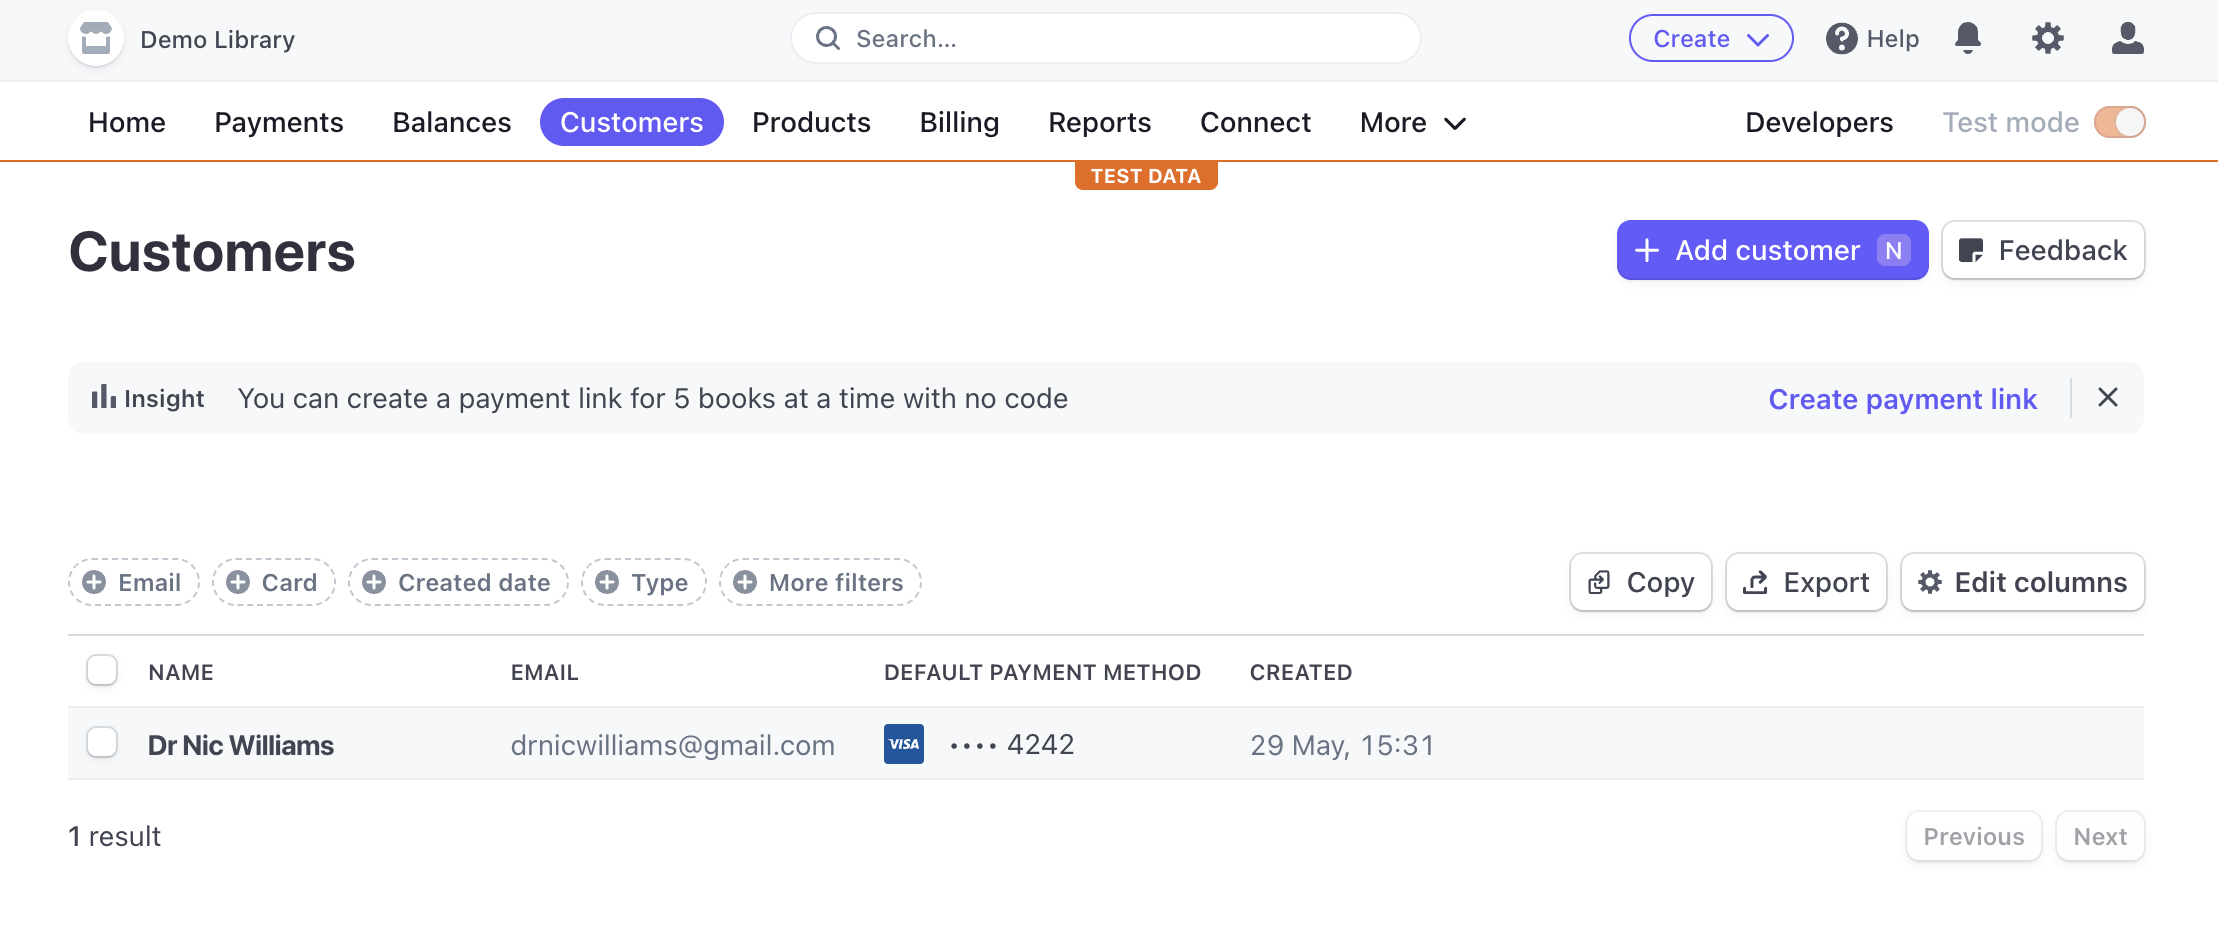
If we click through to Dr Nic Williams customer account, we see the customer's cus_ details matches the processor_id value above.

Back in the rails console we can also check the Account's Subscriptions:
> current_account.subscriptions
[#<Pay::Subscription:0x000000010be8cb08
id: 1,
name: "default",
processor_id: "sub_1NCyfqJSBxbR36IFjdTdw8Iv",
processor_plan: "price_1NCxY5JSBxbR36IFEIcOrrws",
quantity: 1,
trial_ends_at: nil,
ends_at: nil,
created_at: Mon, 29 May 2023 05:31:18.000000000 UTC +00:00,
updated_at: Mon, 29 May 2023 05:35:35.667720000 UTC +00:00,
status: "active",
data:
{"subscription_items"=>
[{"id"=>"si_NywYoSsurYfdII",
"price"=>
{"id"=>"price_1NCxY5JSBxbR36IFEIcOrrws",
"type"=>"recurring",
"active"=>true,
...
"unit_amount_decimal"=>"1200"},
"metadata"=>{},
"quantity"=>1}]},
application_fee_percent: nil,
metadata: {},
customer_id: 1,
current_period_start: Mon, 29 May 2023 05:31:18.000000000 UTC +00:00,
current_period_end: Thu, 29 Jun 2023 05:31:18.000000000 UTC +00:00,
metered: false,
pause_behavior: nil,
pause_starts_at: nil,
pause_resumes_at: nil,
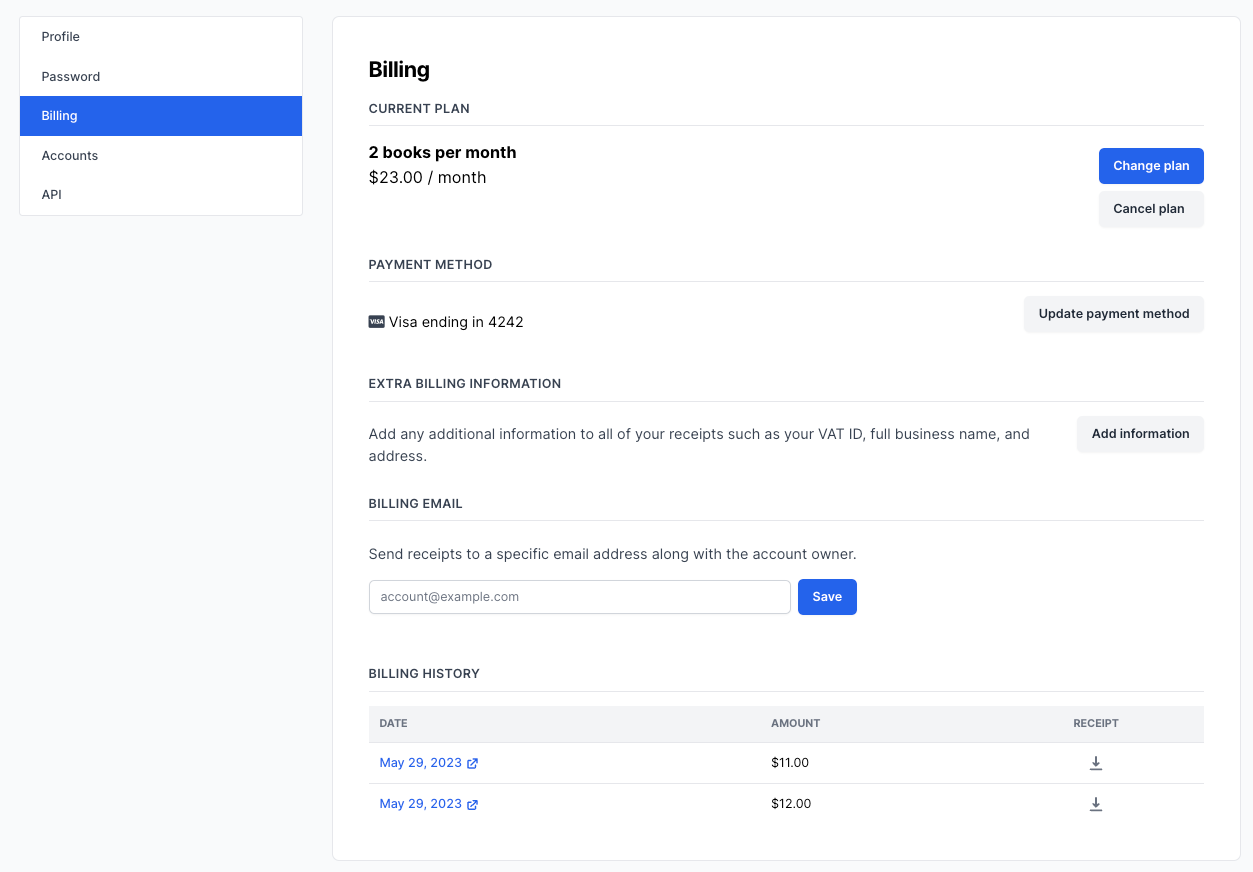
prorate: true>]The application Account can switch between plans. Under their Profile nav menu, they can see their current Billing details.
They can then "Change plan" to a higher or lower plan, and will be debited the additional money if required.
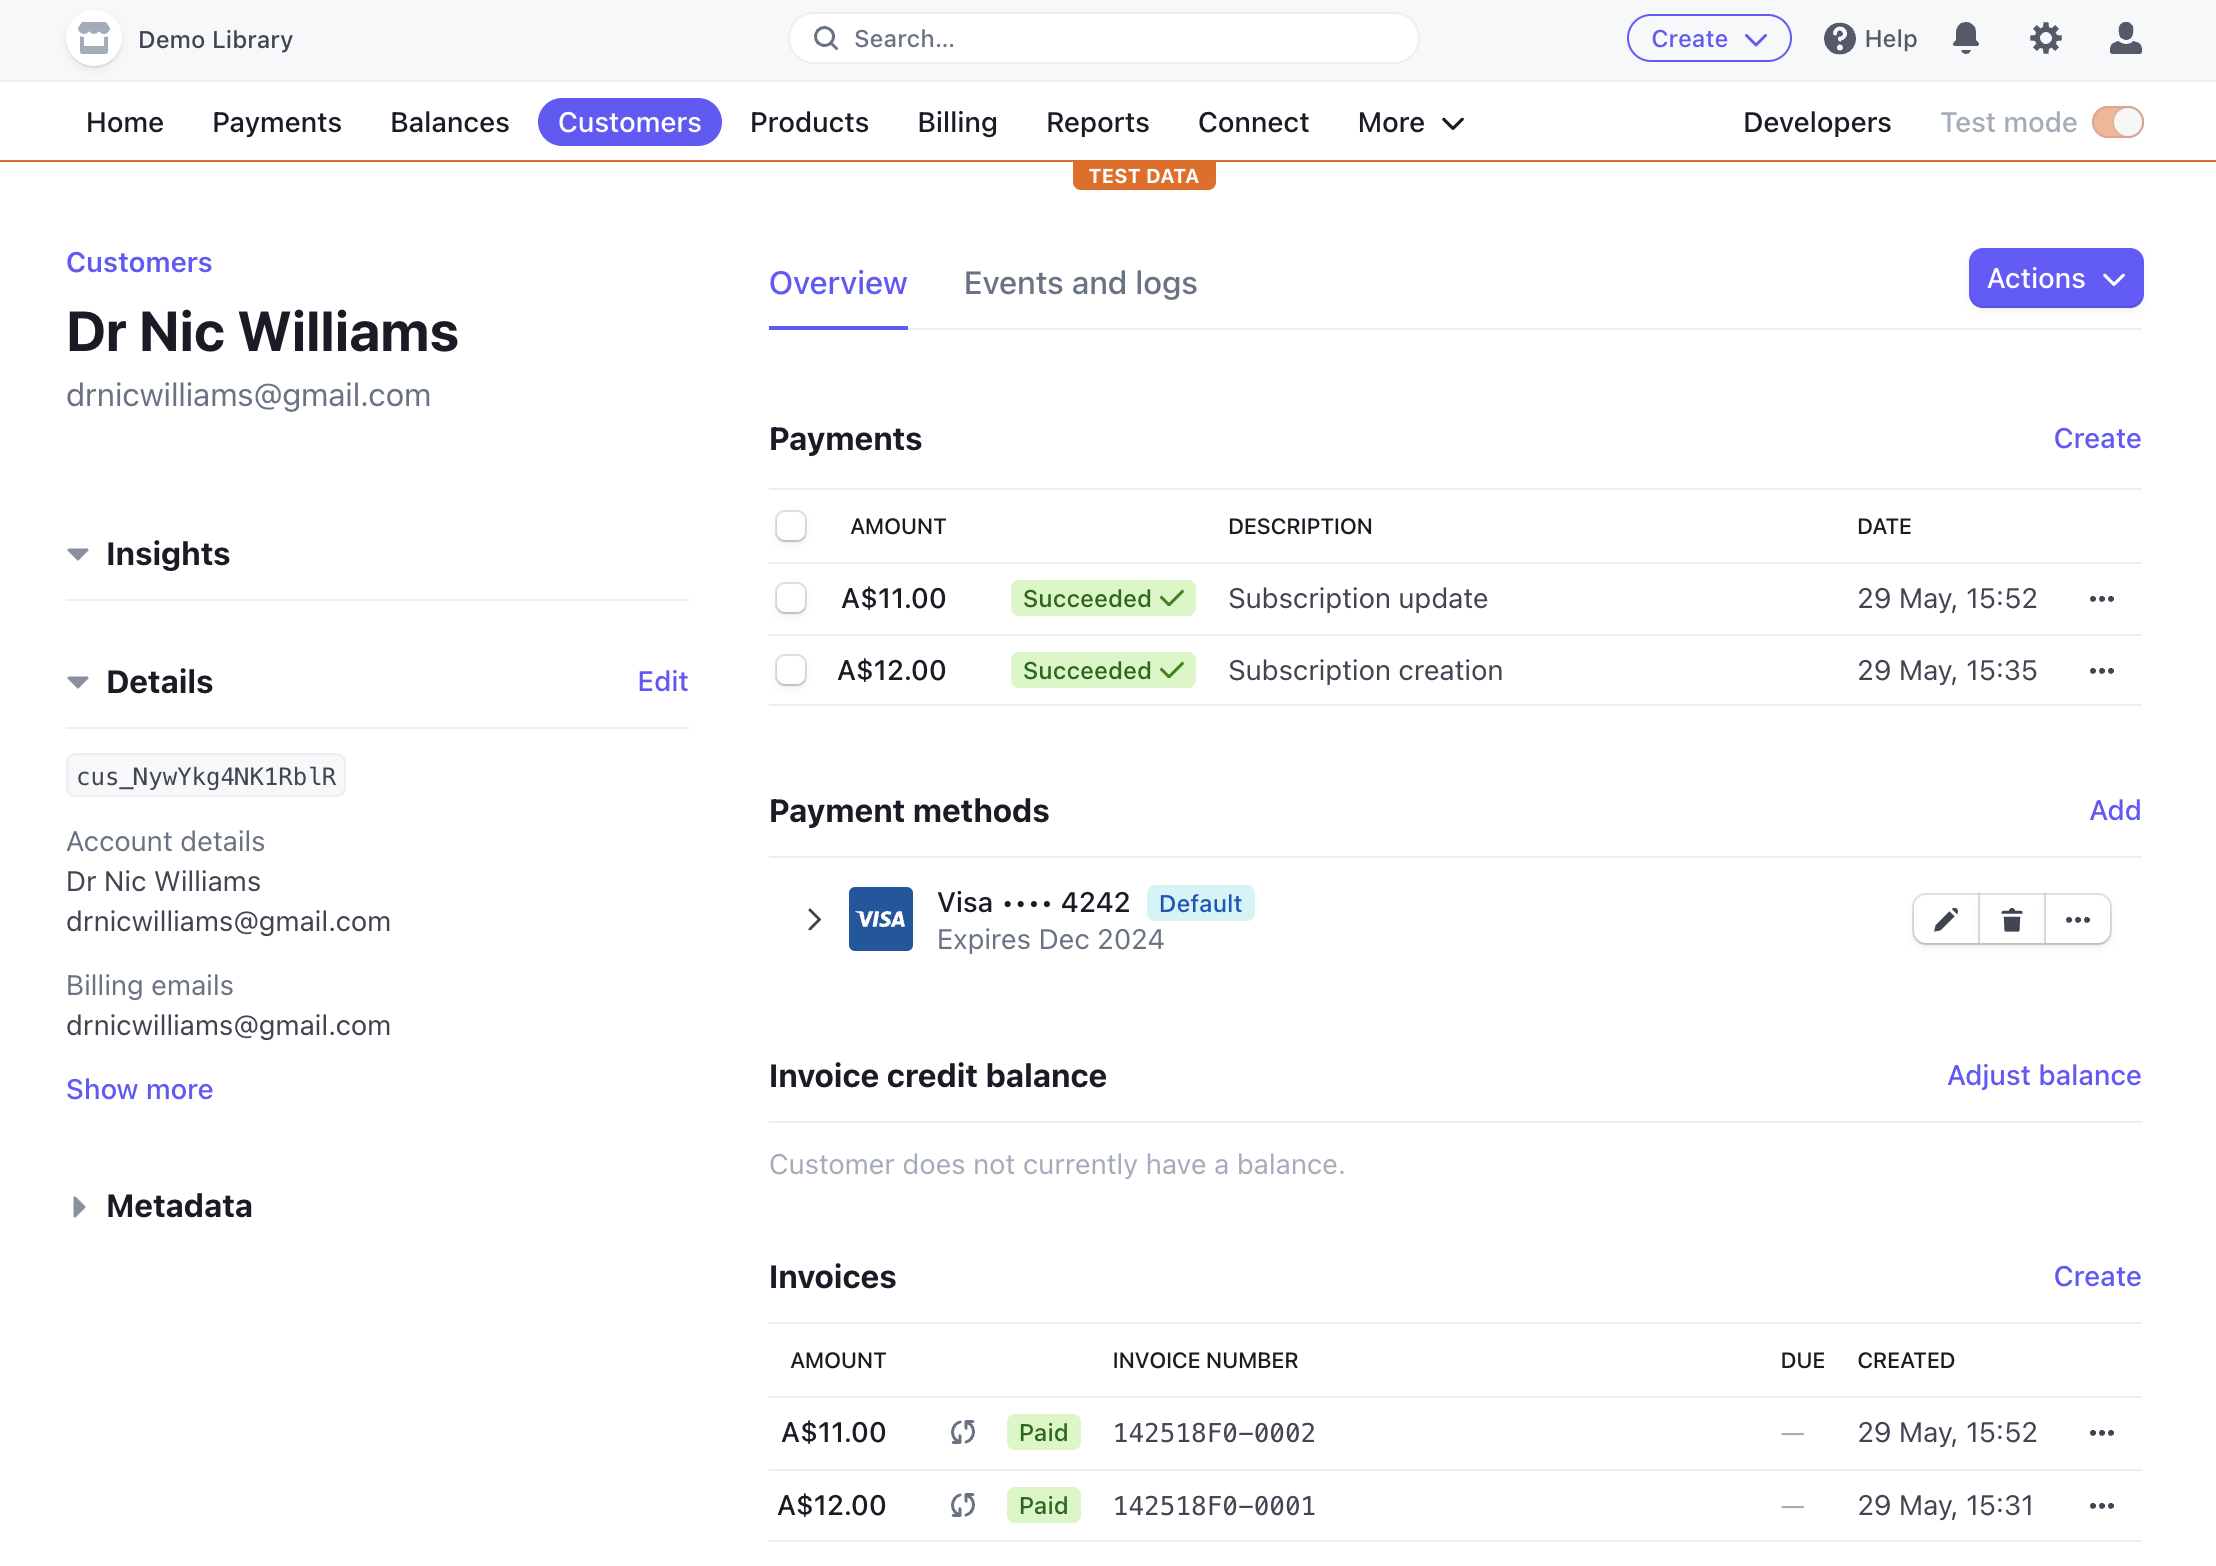
The Account's corresponding Stripe Customer record will also show the updates to payments and invoices:
Step 6 - Using the plans
If a customer account has a "1 book at a time" or "5 books at a time" subscription plan, how do you actually unlock this constraint for them?
Above, we saw that current_account.subscriptions method will return any Pay::Subscription objects describing what the Account is paying for. Or was previously paying for.
The Pay::Subscription activerecord class has a range of scopes/filters you can use.
We will use the .active scope to ensure we allow an Account to borrow books if they have an active subscription: current_account.subscriptions.active.
Jumpstart Pro adds a #plan method to Pay::Subscription to return which Plan the customer Account subscribed to:
> sub = current_account.subscriptions.active.first
> sub.plan
#<Plan:0x00000001202ba018
 name: "2 books per month",
 amount: 2300,
 interval: "month",
 details: {"stripe_id"=>"price_1NCxdiJSBxbR36IFuZfRSSbd"},
 ...
 features: nil>
We can now figure out what Plans our current_account is paying for. But how do we use this? How do know that "2 books a month" means we need to constrain/limit the current_account to borrowing 2 books during the month?
We will slightly extend the Plan model to add a books_per_month attribute, and we will configure this in our db/seeds.rb.
We could add a DB migration to add an integer books_per_month attribute to the Plan model.
rails g migration AddBooksPerMonthToPlans books_per_month:integerAlternately, we can reuse the Plan#details JSONB attribute. This details DB column is already being used to store the stripe_id value in the example above.
To add books_per_month and books_per_month= methods to Plan, add the following line to app/models/plan.rb:
class Plan < ApplicationRecord

   # Add this line
   store_accessor :details, :books_per_month

   # As a bonus, add this method to ensure `books_per_method`
   # returns an integer; defaulting to 0
   def books_per_month
     super.to_i
   end
 end
I'm totally not convinced either is better. Perhaps the former – explicit PostgreSQL integer column – is better as you get type casting for free.
Either way you go – new DB column or reusing the details JSONB column – we now have books_per_month and books_per_month= methods on Plan.
We can set this attribute into our db/seeds.rb:
  plans = [
    {name: "1 book per month", books_per_month: 1, amount: 1200, interval: "month", stripe_id: "price_1NCxY5JSBxbR36IFEIcOrrws"},
    {name: "1 book per month", books_per_month: 1, amount: 12000, interval: "year", stripe_id: "price_1NCxY5JSBxbR36IFa7GalbQ5"},
    {name: "2 books per month", books_per_month: 2, amount: 2300, interval: "month", stripe_id: "price_1NCxdiJSBxbR36IFuZfRSSbd"},
    {name: "2 books per month", books_per_month: 2, amount: 23000, interval: "year", stripe_id: "price_1NCxdiJSBxbR36IFkIcdVfJH"},
    {name: "5 books per month", books_per_month: 5, amount: 5000, interval: "month", stripe_id: "price_1NCxeNJSBxbR36IFNVvi6Xbf"},
    {name: "5 books per month", books_per_month: 5, amount: 50000, interval: "year", stripe_id: "price_1NCxeNJSBxbR36IFdar2iobu"}
  ]
Run rails db:seed again.
We now have a way to calculate how many books an Account can borrow per month: for each current_account.subscriptions.active, we sum up the Plan#books_per_month .
We could add the following method into app/models/account.rb:
class Account < ApplicationRecord

  # Sum up each active subscription's plan's books_per_month
  def books_per_month
    subscriptions.active.sum do |sub|
      sub.plan.books_per_month
    end
  end
end
The Account can now subscribe to multiple Plans, and we will count up the total of their books_per_method.
> current_account.books_per_month
2
Step 7 - Going live into production
We now need to repeat steps 2 to 5 to:
- Recreate the Stripe Products in your production Stripe account
- Register our
Planobjects in our production application, and - Configure production API keys, including the webhook signing secret.
- Test that it is working.
Firstly, activate your Stripe account and toggle "Test mode" off:
You are now in the live dashboard for your real customers, real products/subscription plans, and real money. It's scary. Let's go back to "Test mode".
Each of our Products can now be "Copy to live mode".
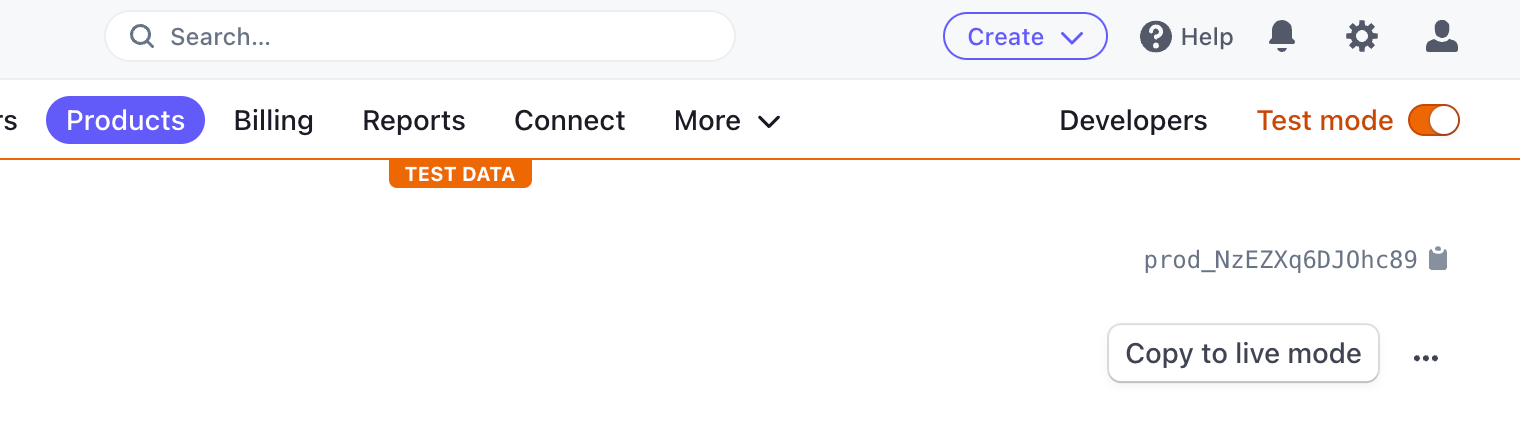
This will create a new production Product, with new production Pricing for each billing period.
That is, whilst you can quickly create the 2 production Products with "Copy to live mode", the 6 Billing period pricing "API ID" values are new, and not the same as our db/seeds.rb values.
One path to take is to rails db:seed into your production Rails database, which creates the 6 Plan records, but with bad stripe_id values. Next, go to the JSP admin console, and edit each of the Plan records' stripe_id value for the correct "API ID" for the corresponding Billing period pricing record in Stripe.
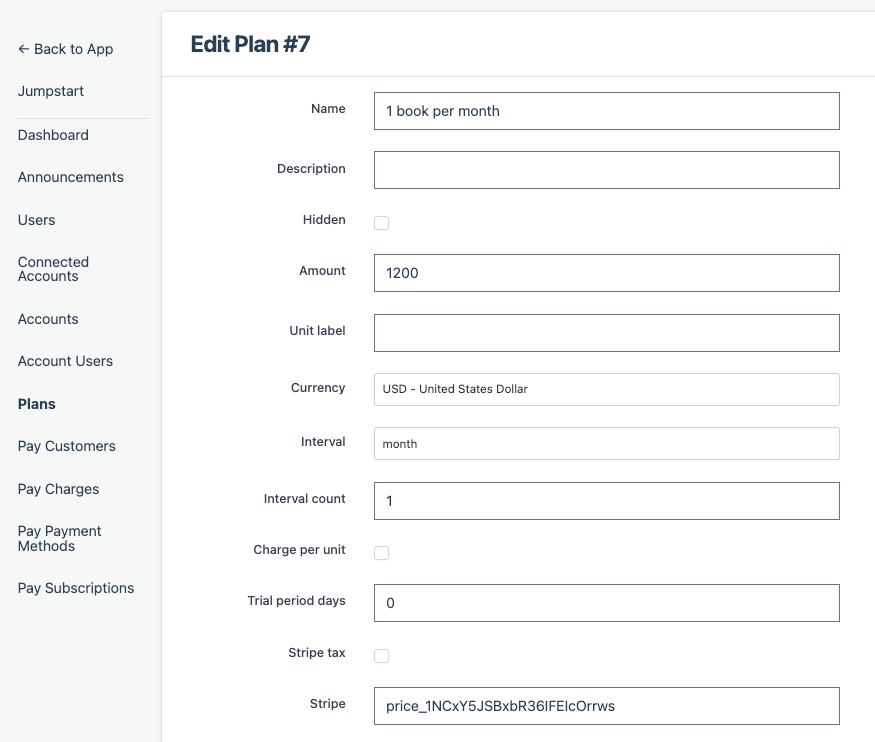
The stripe_id attribute appears as "Stripe" attribute in the admin console:
The production API keys, like the dev/test API keys, are under the "Developers" menu bar, and the "Standard keys" panel.
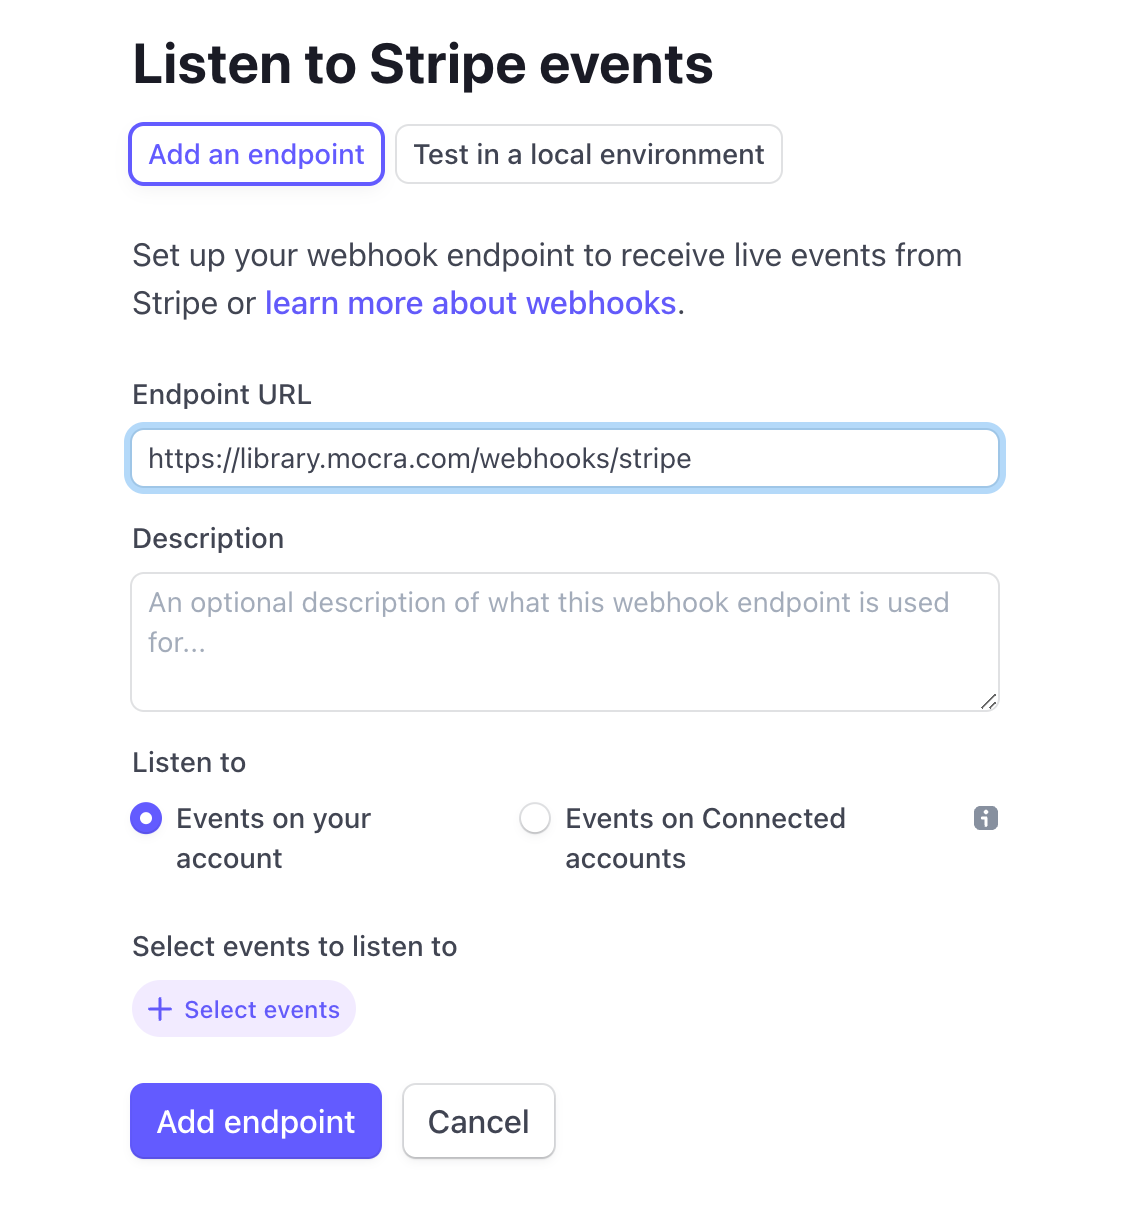
Next, register a "Webook" endpoint. We need Stripe to talk to our production application about any updates to products, customers, and especially payments.
Click on "Webhooks" submenu, and click on "Add an endpoint".
The "Endpoint URL" is your production app's hostname, and the /webhooks/stripe path.
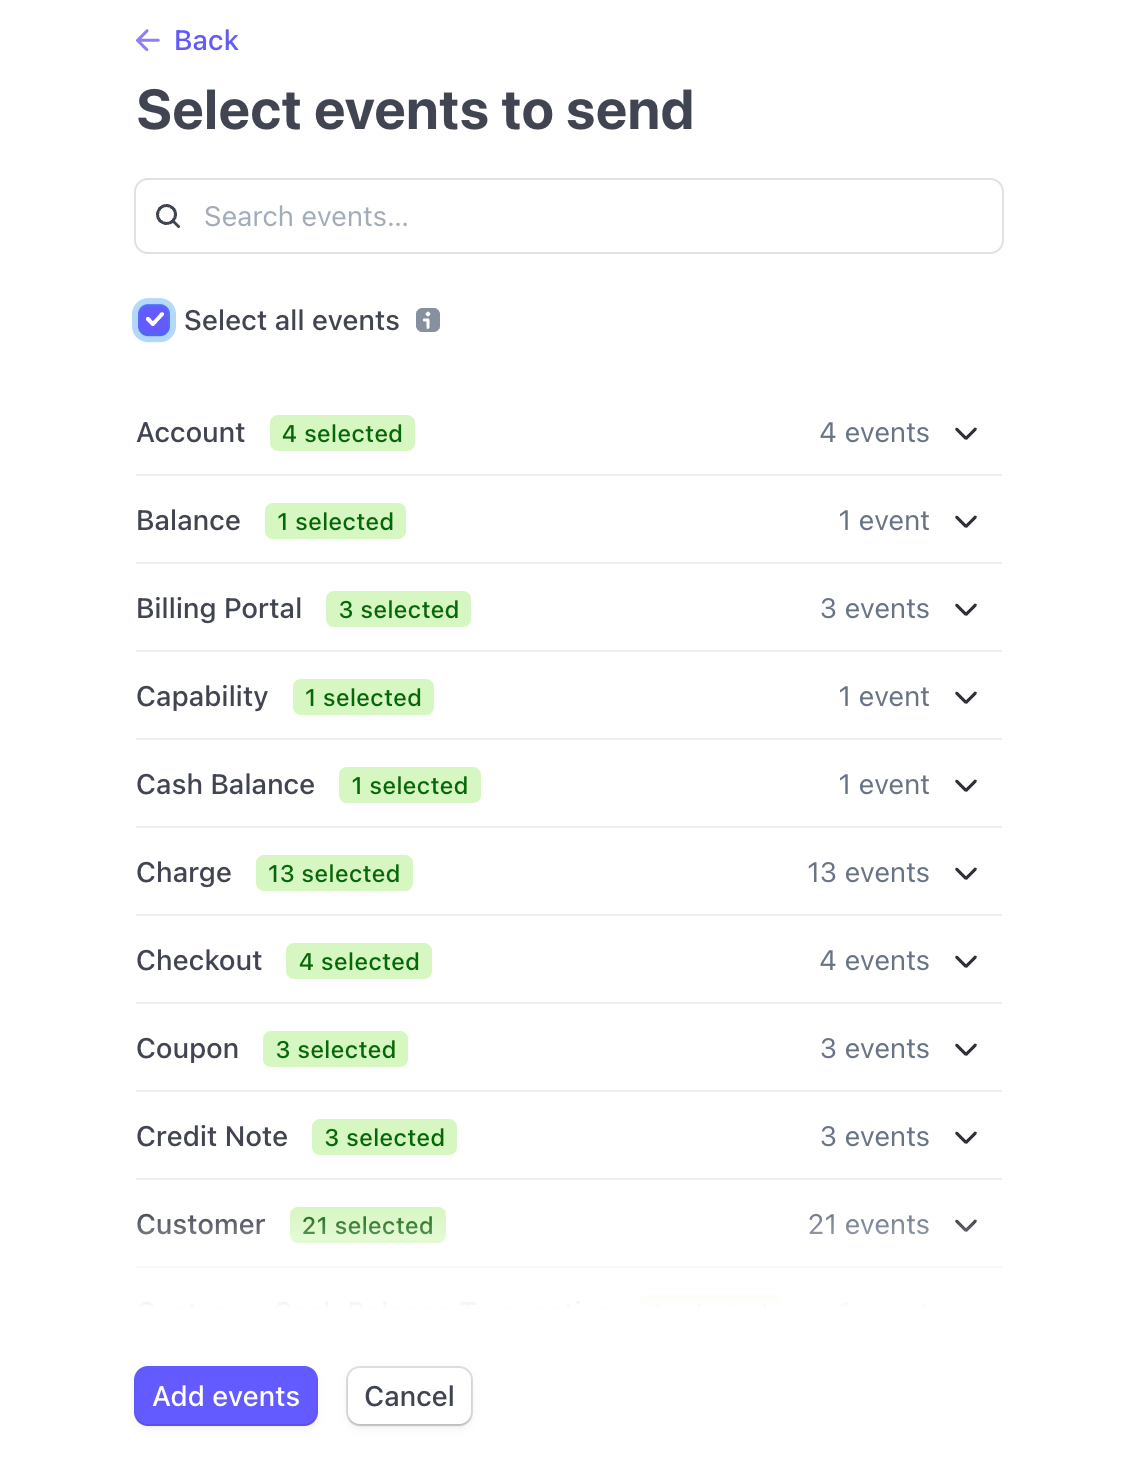
Click on "Select events", toggle "Select all events", and click the "Add events" button.
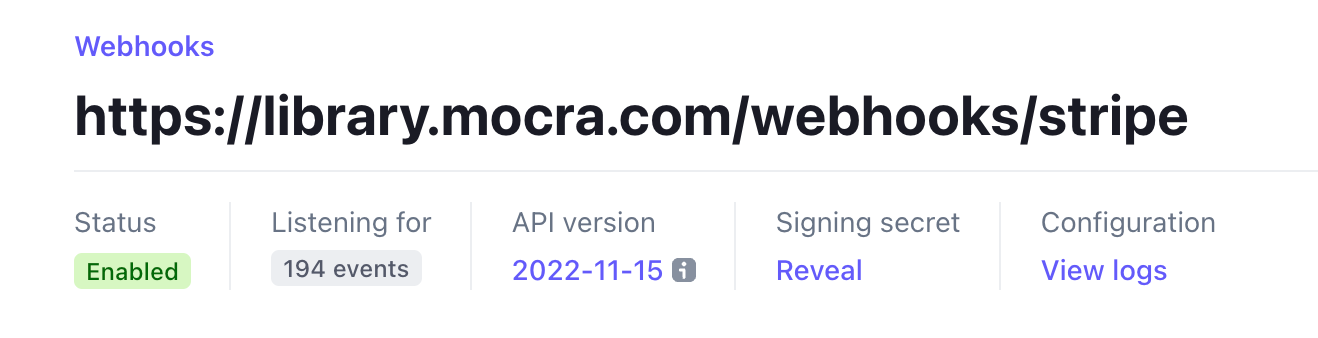
You can now reveal the Signing Secret.
The two API secret keys, plus the Signing Secret, can now be added to your Rails app's production encrypted configuration, under the stripe: section.
rails credentials:edit --environment productionRemember to git commit the changes to the encrypted file, and push it into production.
Finally, test that it is working.
Visit the "Pricing" page, and sign up for one of your own plans. Pay for it. It's your money. You'll pay a small % to Stripe for the test run.
It's your product, be your own first customer.
Or, create your self a hidden Free plan and assign it to your production Account. But that's less delightful than your new business getting it's first, best customer. You.
Chris Oliver: Pros and Cons of Stripe setup
The built-in Stripe/Pay gem solution for Jumpstart Pro uses the Stripe "Payment Element" API. It has some limitations, which become limitations for Jumpstart Pro.
The cons of Stripe Payment Elements and Jumpstart Pro are the missing support for taxes, promo codes, and multiple currencies.
These features are available with Stripe Checkout. Unforunately, Stripe Checkout cannot be fully themed to look like our website.
The pros are that we can design/theme the payment checkout flow to look like our own site.
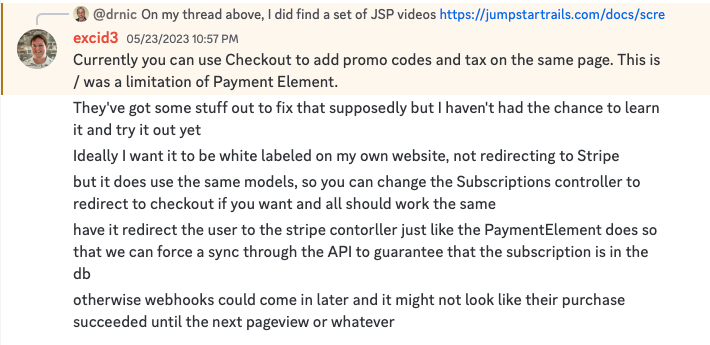
Switching or trialing Stripe Checkout will be another blog article. For now, here are some thoughts from Chris Oliver from the Go Rails Discord server [link to messages]:
Summary
When I started this article I guessed the title: "5 steps to setup Stripe and Jumpstart Pro". As the article got longer and longer, it became 7 steps. I even made the URL for the article generic /steps-to-setting-up-stripe-payments-with-jumpstart-pro in case I needed to add even more steps in future.
Setting up Stripe, and setting up subscription plans in JSP, is relatively easy but it is many dependent steps, many screenshots, and a few things that weren't adequately documented in Jumpstart Pro's documentation or within the JSP code base.
I have deleted the "Demo Library" Stripe account, so all the real stripe_id values used in the examples are now gone.
If you followed along, found any errors in the article, or wished it explained something else, please send me a note via the Contact Us form, find me on twitter or mastodon, or find me in the #jumpstart-pro channel on the Go Rails discord server. I'm @drnic in all the places. Thank you very much for reading the article.